Electronics
Overview
In order to construct a QUACK box, our team designed three custom PCBs:
- An input board
- An output board
- A coupling board
All of our custom PCBs were ordered through JLCPCB, a Chinese-based PCB manufacturing and assembly house.
PCB Fabrication Files
Here are the links to our PCB fabrication files:
Each link contains three files necessary for ordering the boards, including:
- Gerber Files: These files contain the information needed to manufacture the board itself, holding information like the copper traces, solder mask, drill holes, and silkscreen. It is not necessary to unzip the GERBER files.
- BOM (Bill of Materials): This file lists all the components required for PCB assembly, including their part numbers and quantities.
- CPL (Centroid File): This file provides the coordinates of each component on the PCB, enabling JLCPCB’s automated assembly processes.
PCB Ordering Instructions through JLCPCB
Video Demo of Input Board Ordering
For a demonstration of how to Pre-order parts for the input board, and how to start the ordering process, see…
Part 1: Pre-ordering and Setup.
Then, see…
Written Instructions for General Ordering
Note that for the input board, we recommend making the internal copper layers 1oz instead of 0.5 oz. Otherwise, the rest of the ordering options match the generic process outlined below. Follow the same procedure for each of the three custom PCBs needed for a full QUACK box.
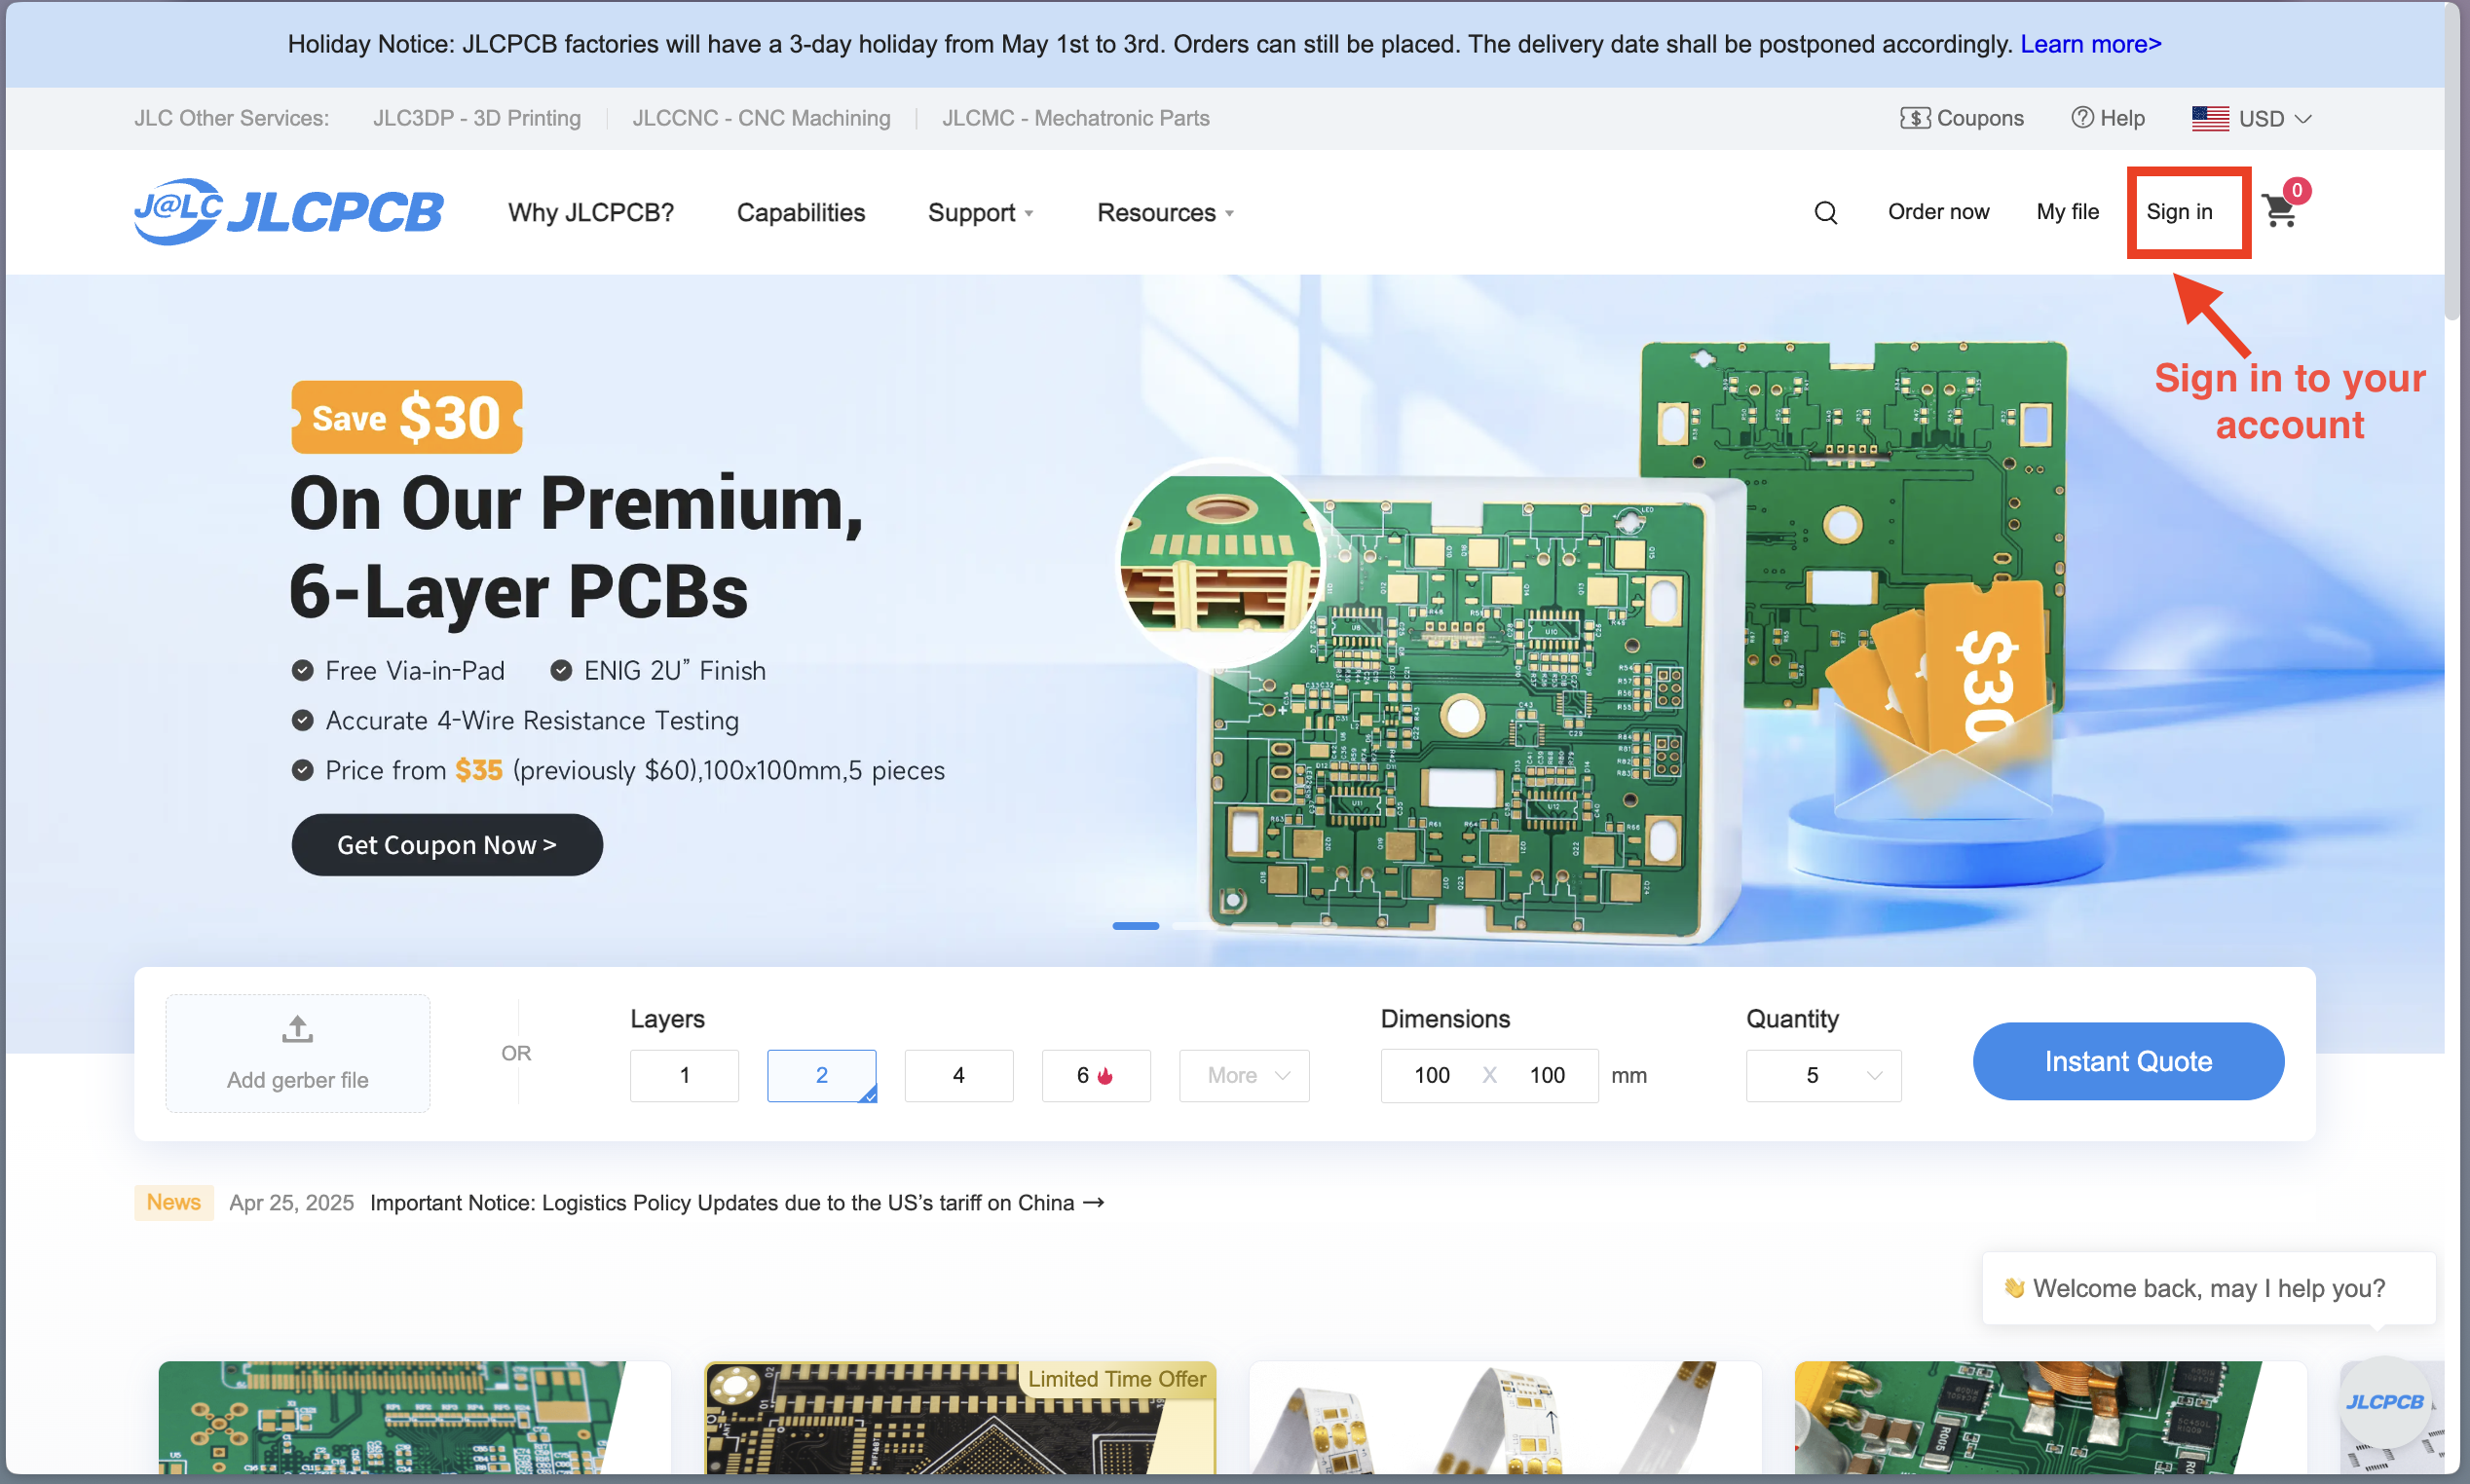
- Go to JLCPCB and create an account or sign in. It is essential that you are logged in any time you want to do anything meaningful with JLCPCB, like ordering or preordering.
Pre-Order Components, as shown in the Part 1 video demo above. Use this Google Spreadsheet to reference the “English” versions of the BOM, which includes Part numbers. Note that you’ll need:
5x Assembled Input Boards
5x Assembled Output Boards
2x Assembled Coupling Boards
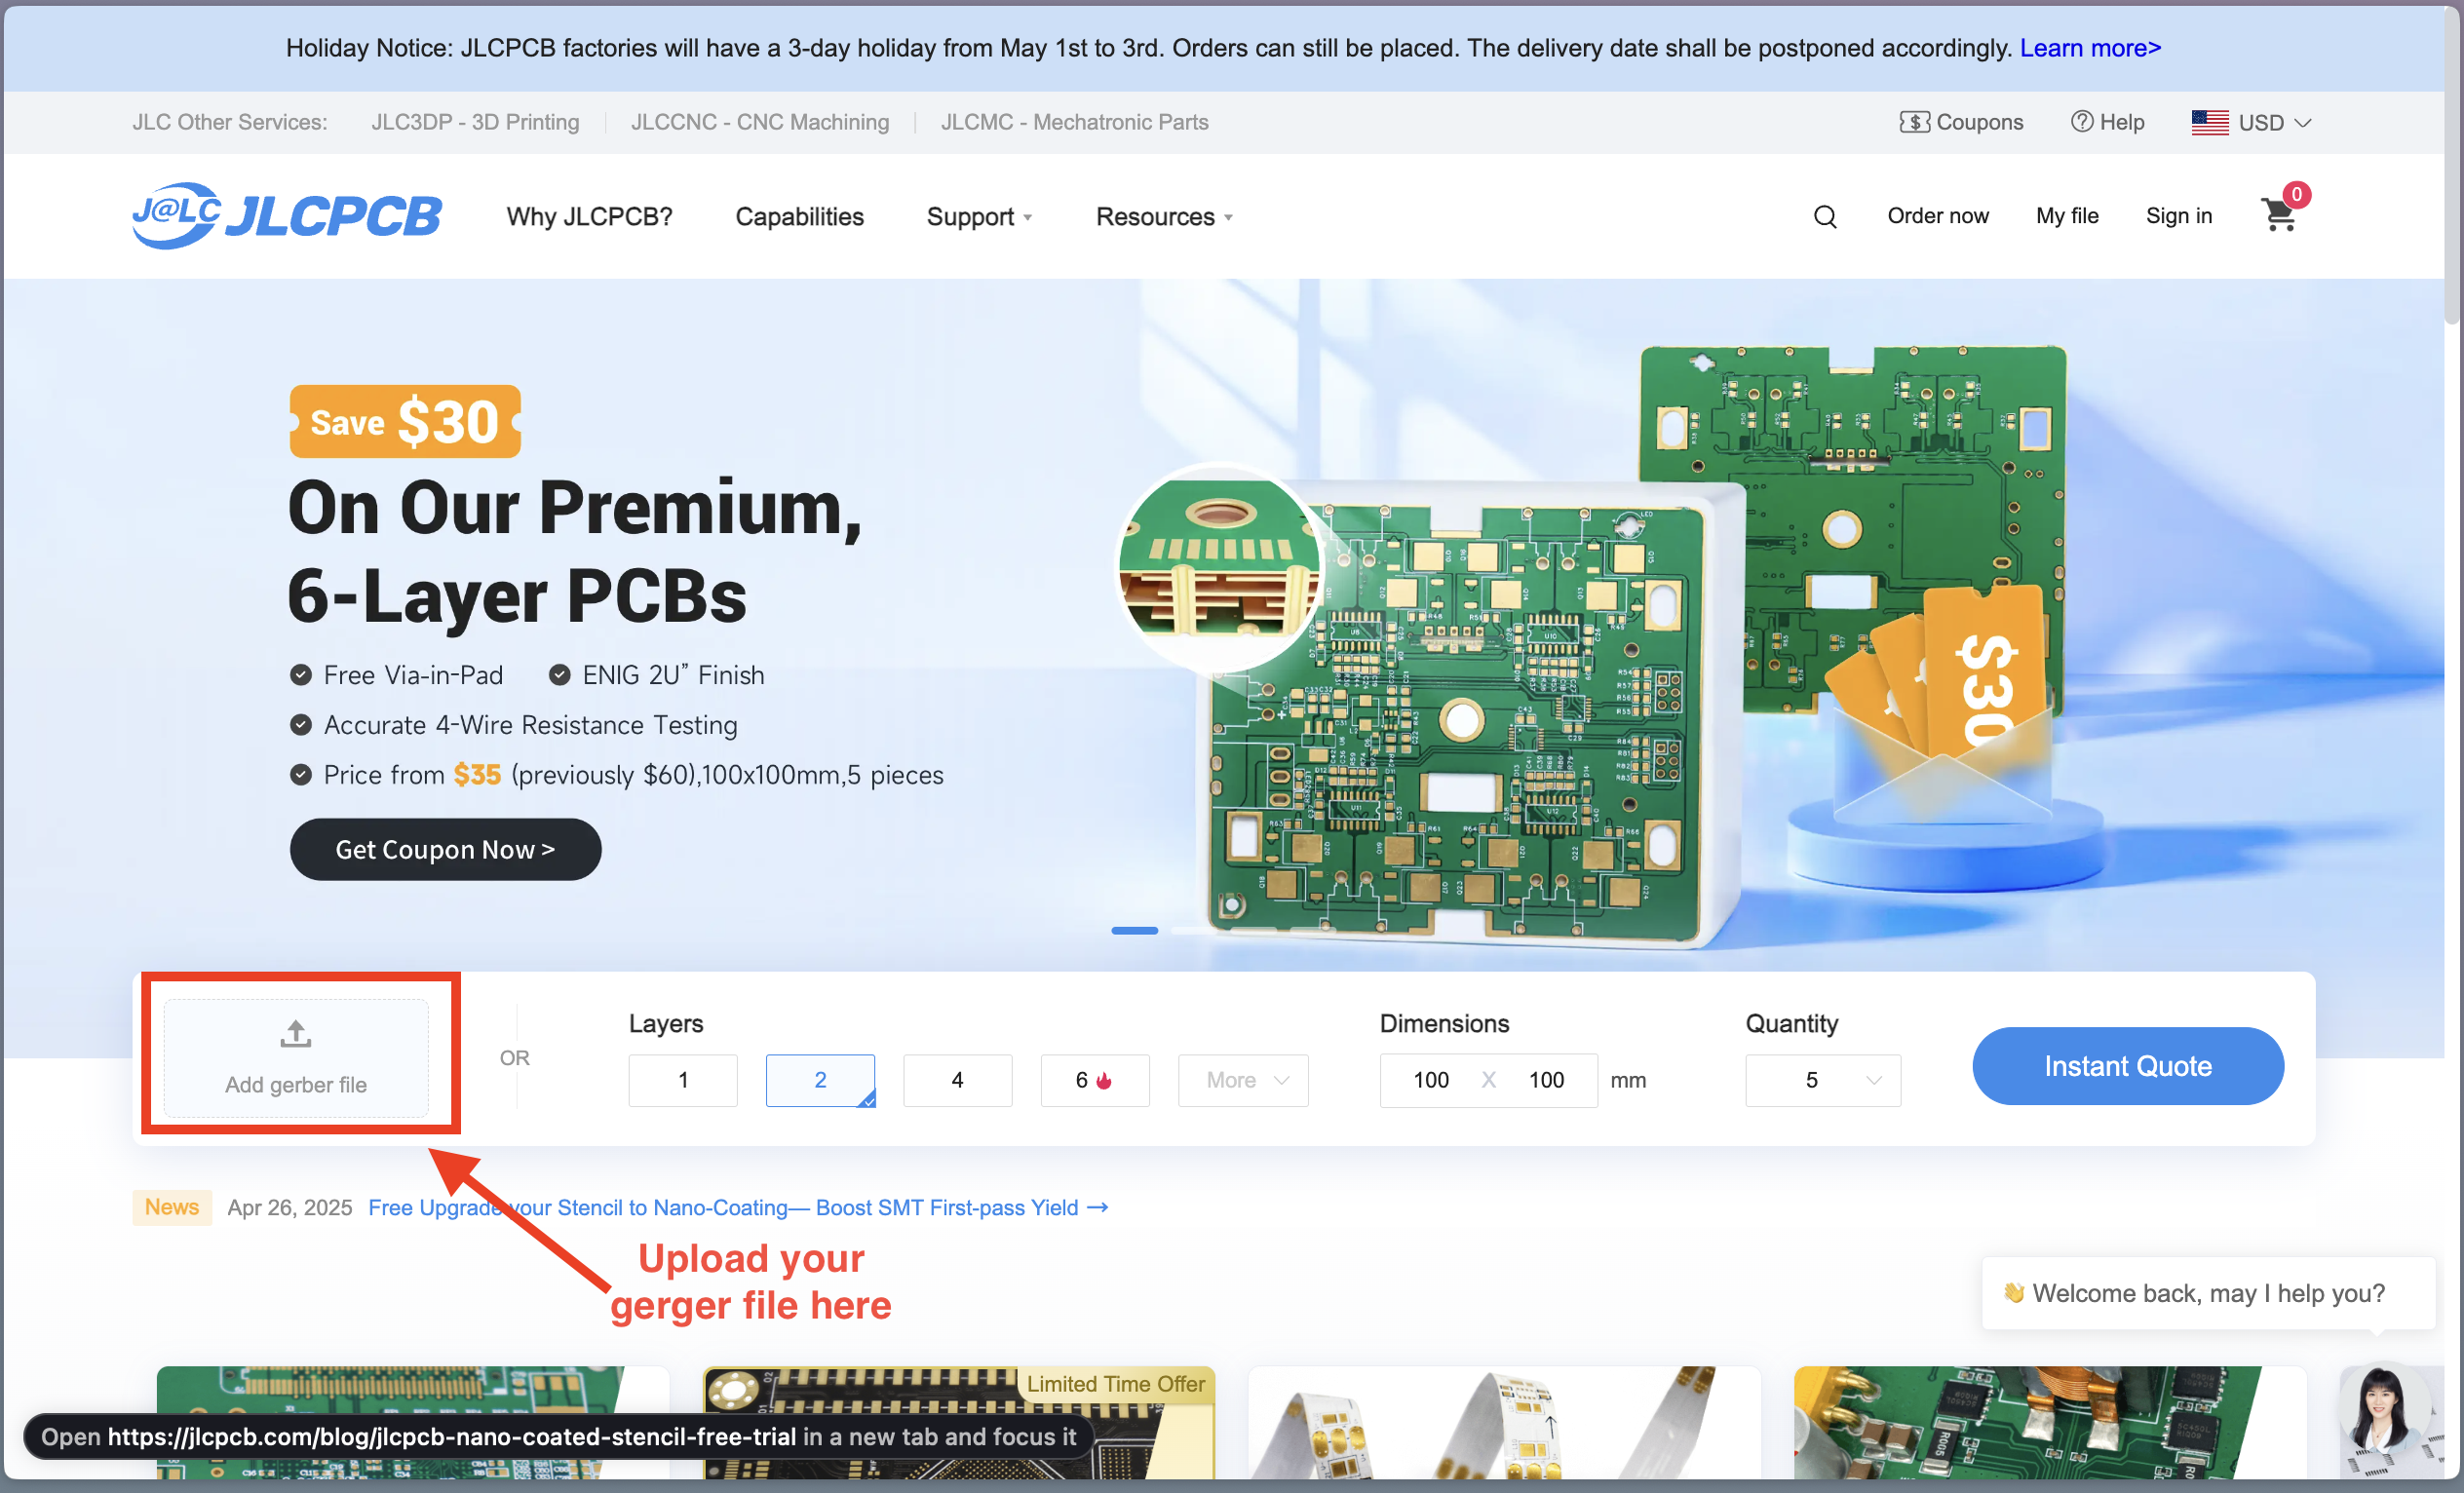
Upload your Gerger files as indicated in the image below.
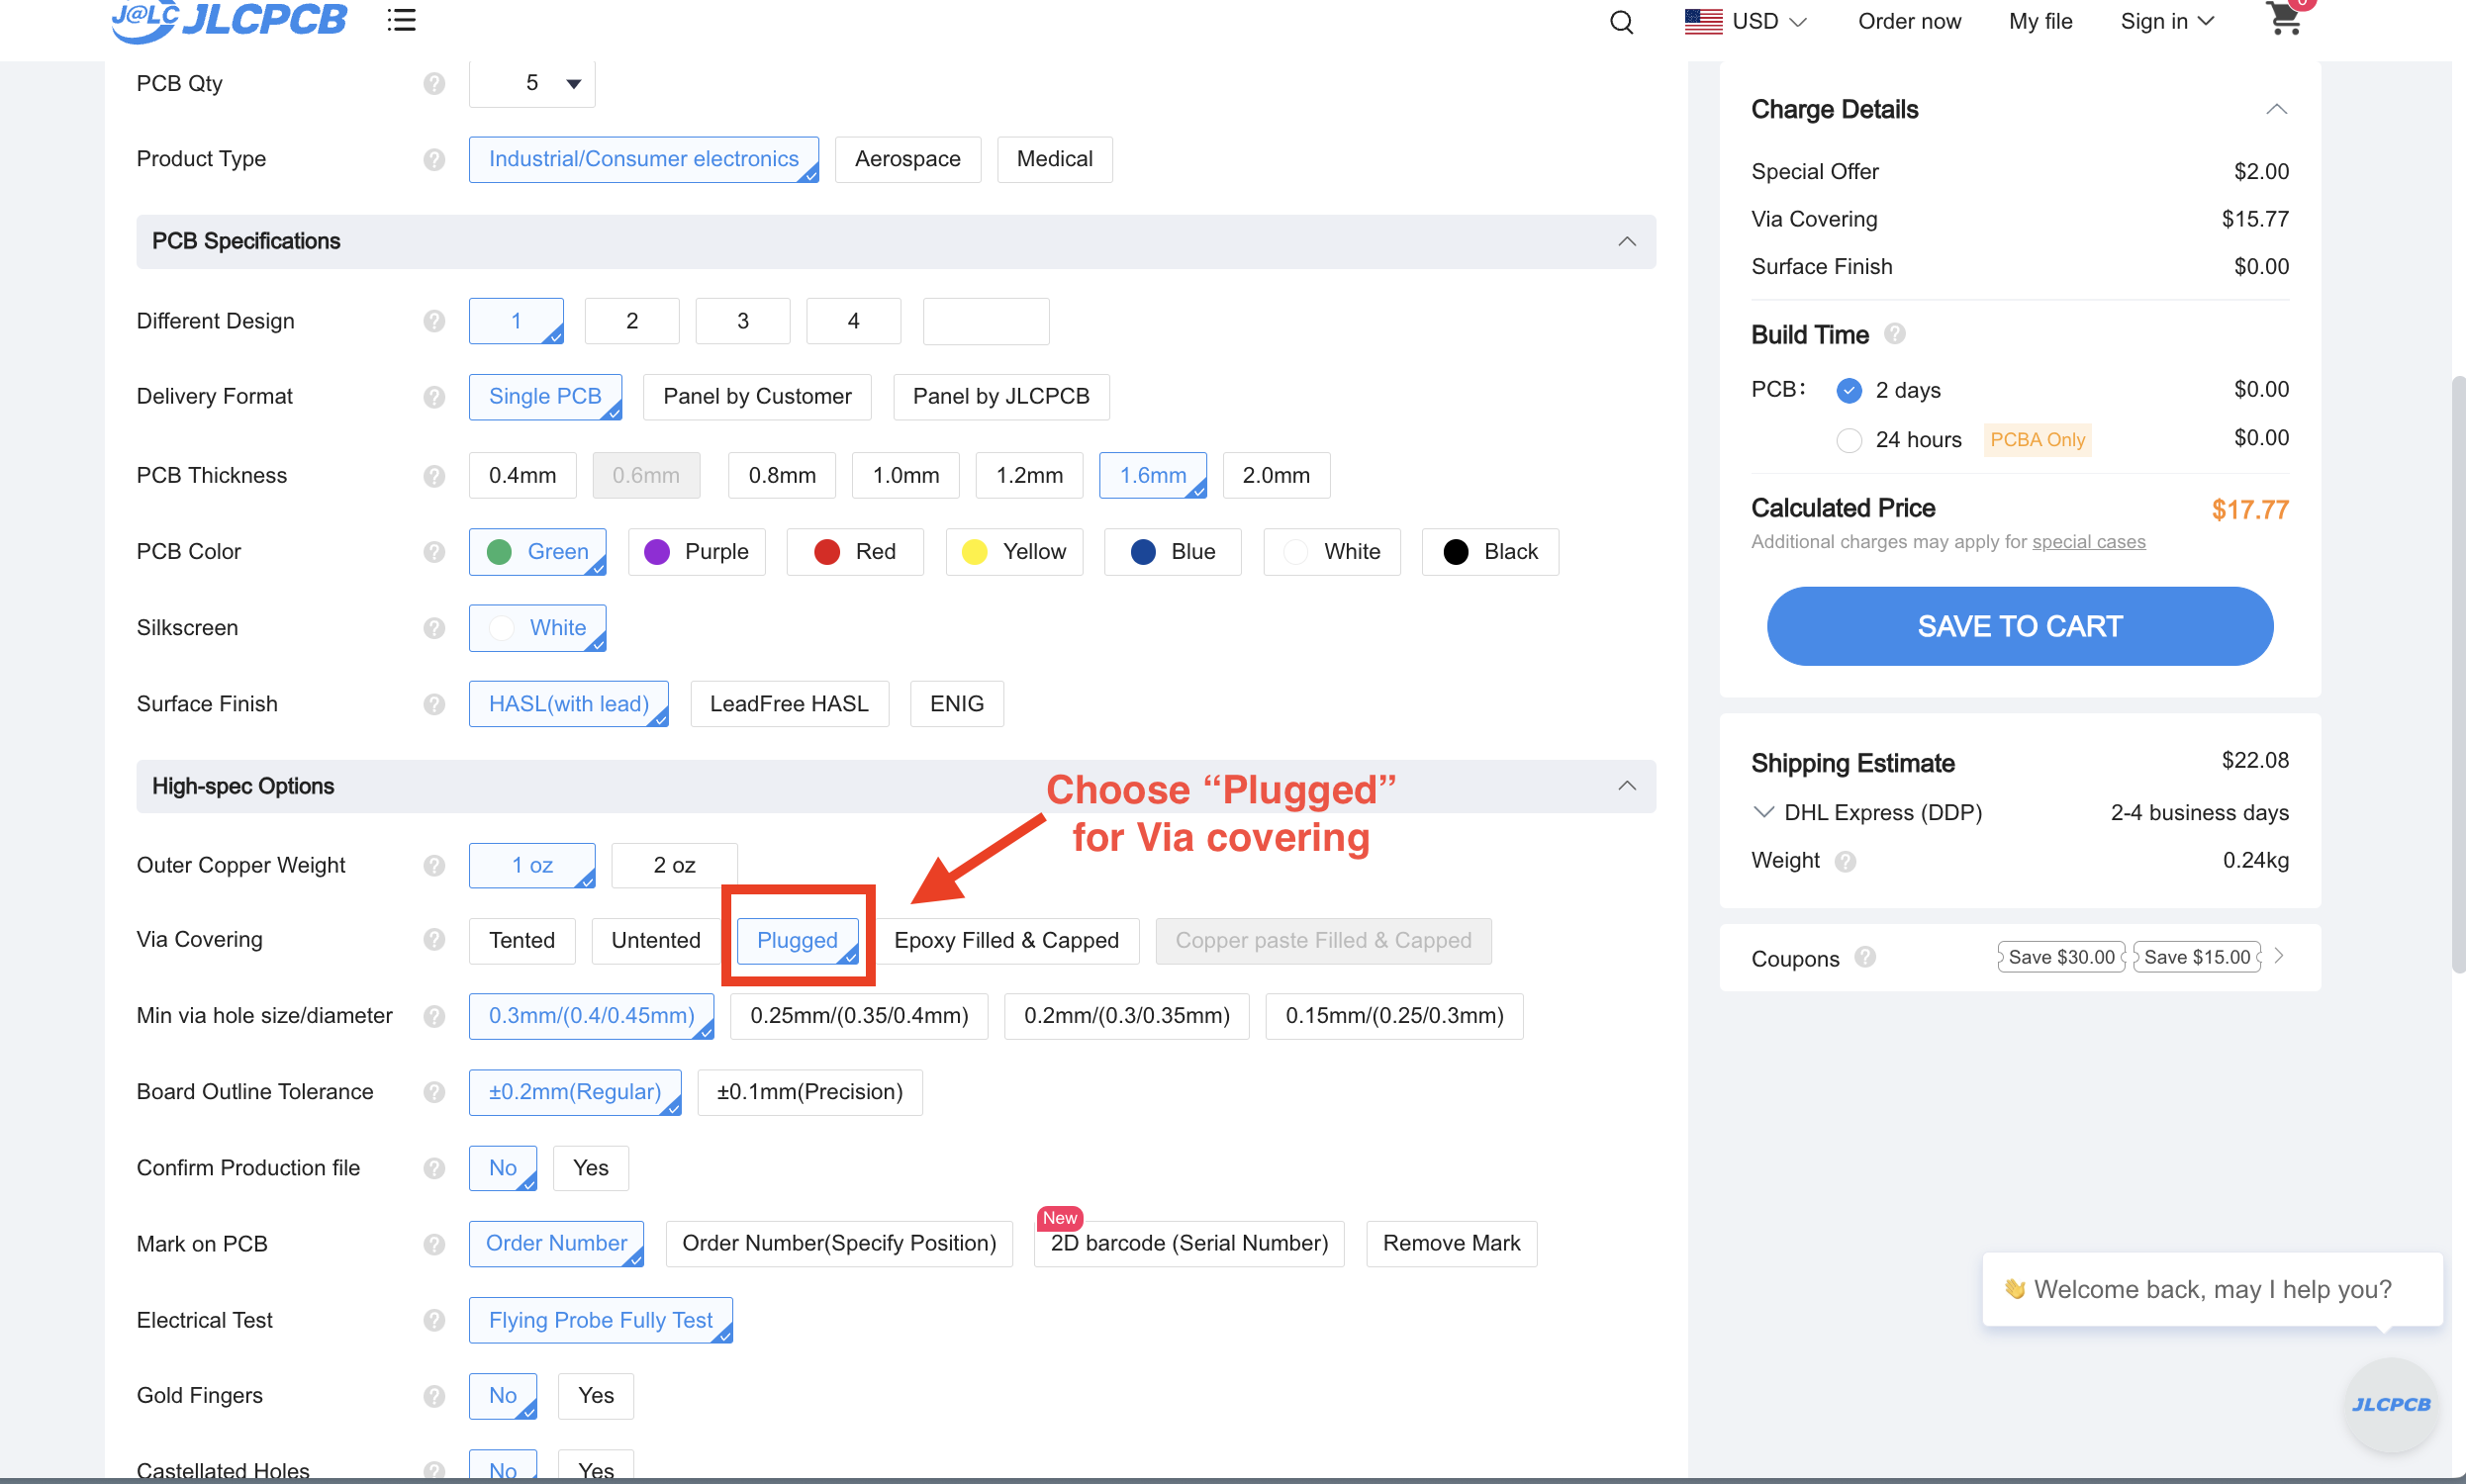
After processing, the page will show all of the options for ordering the PCB. Most of the defaults are okay, but we recommended using the these following options:
- Choose Plugged for Via Covering.
- For the Input Board, leave the Economic PCB selected. For the Output and Coupling baords, select “Standard” PCB.
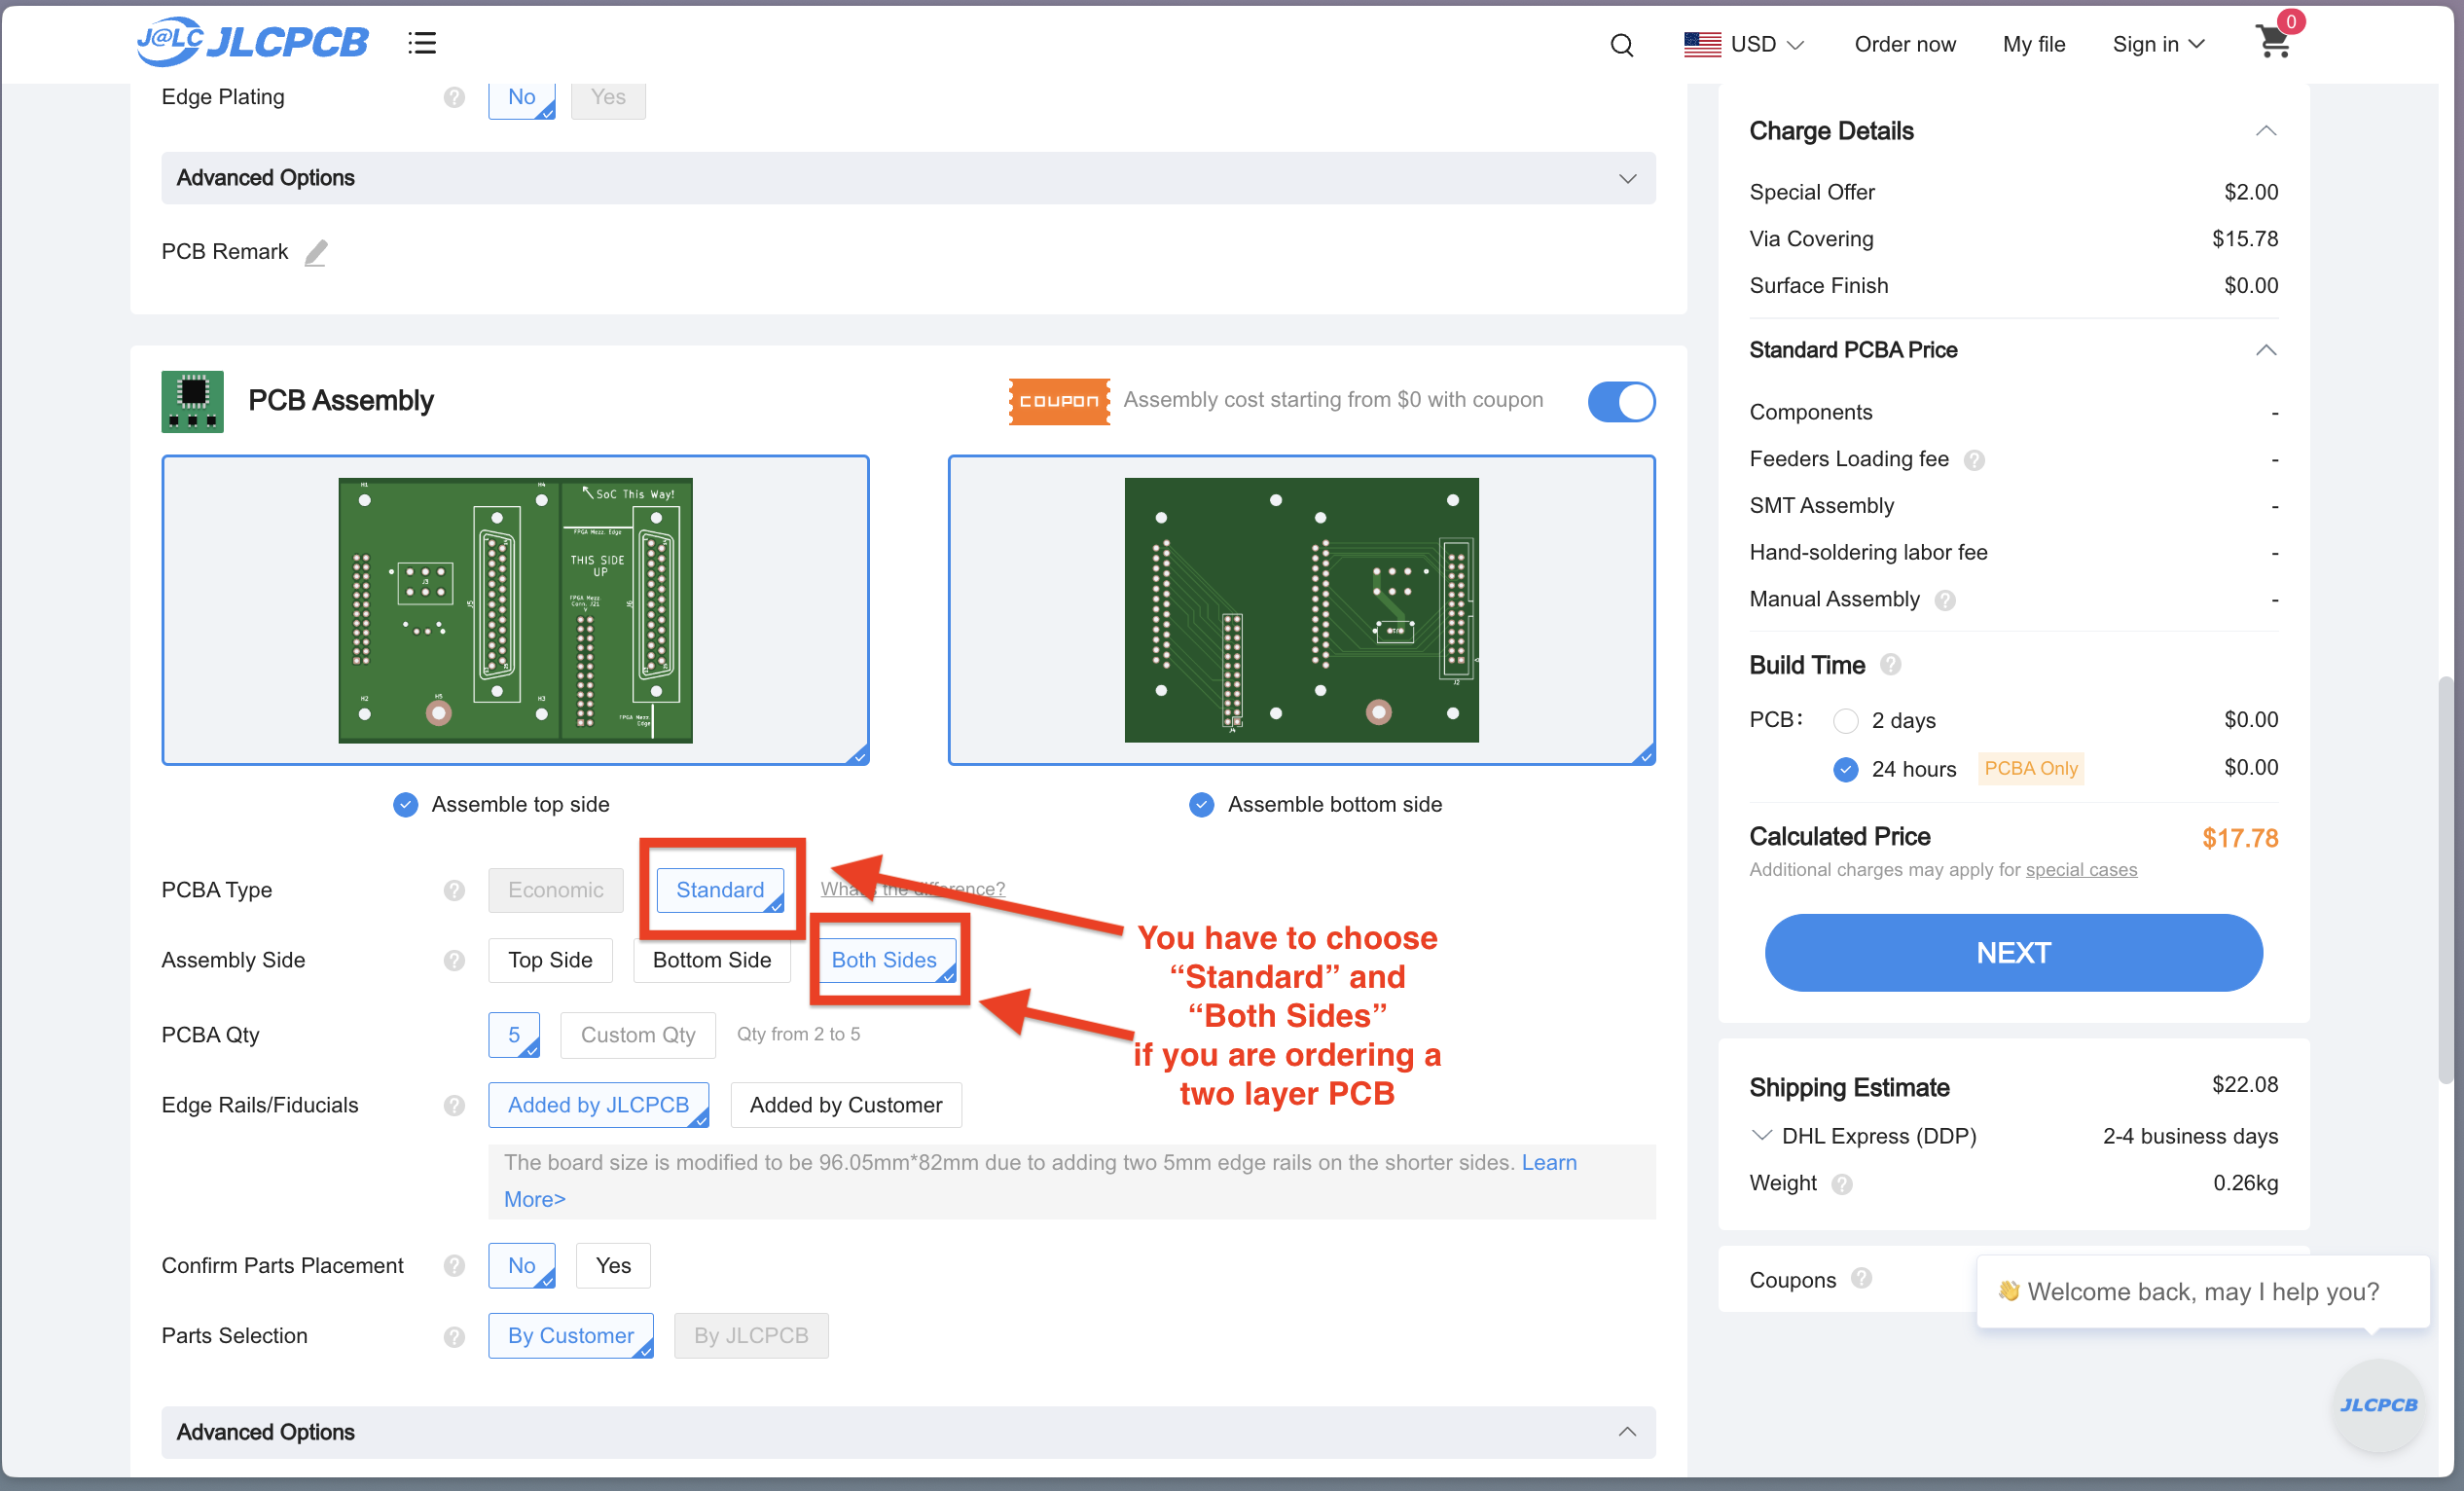
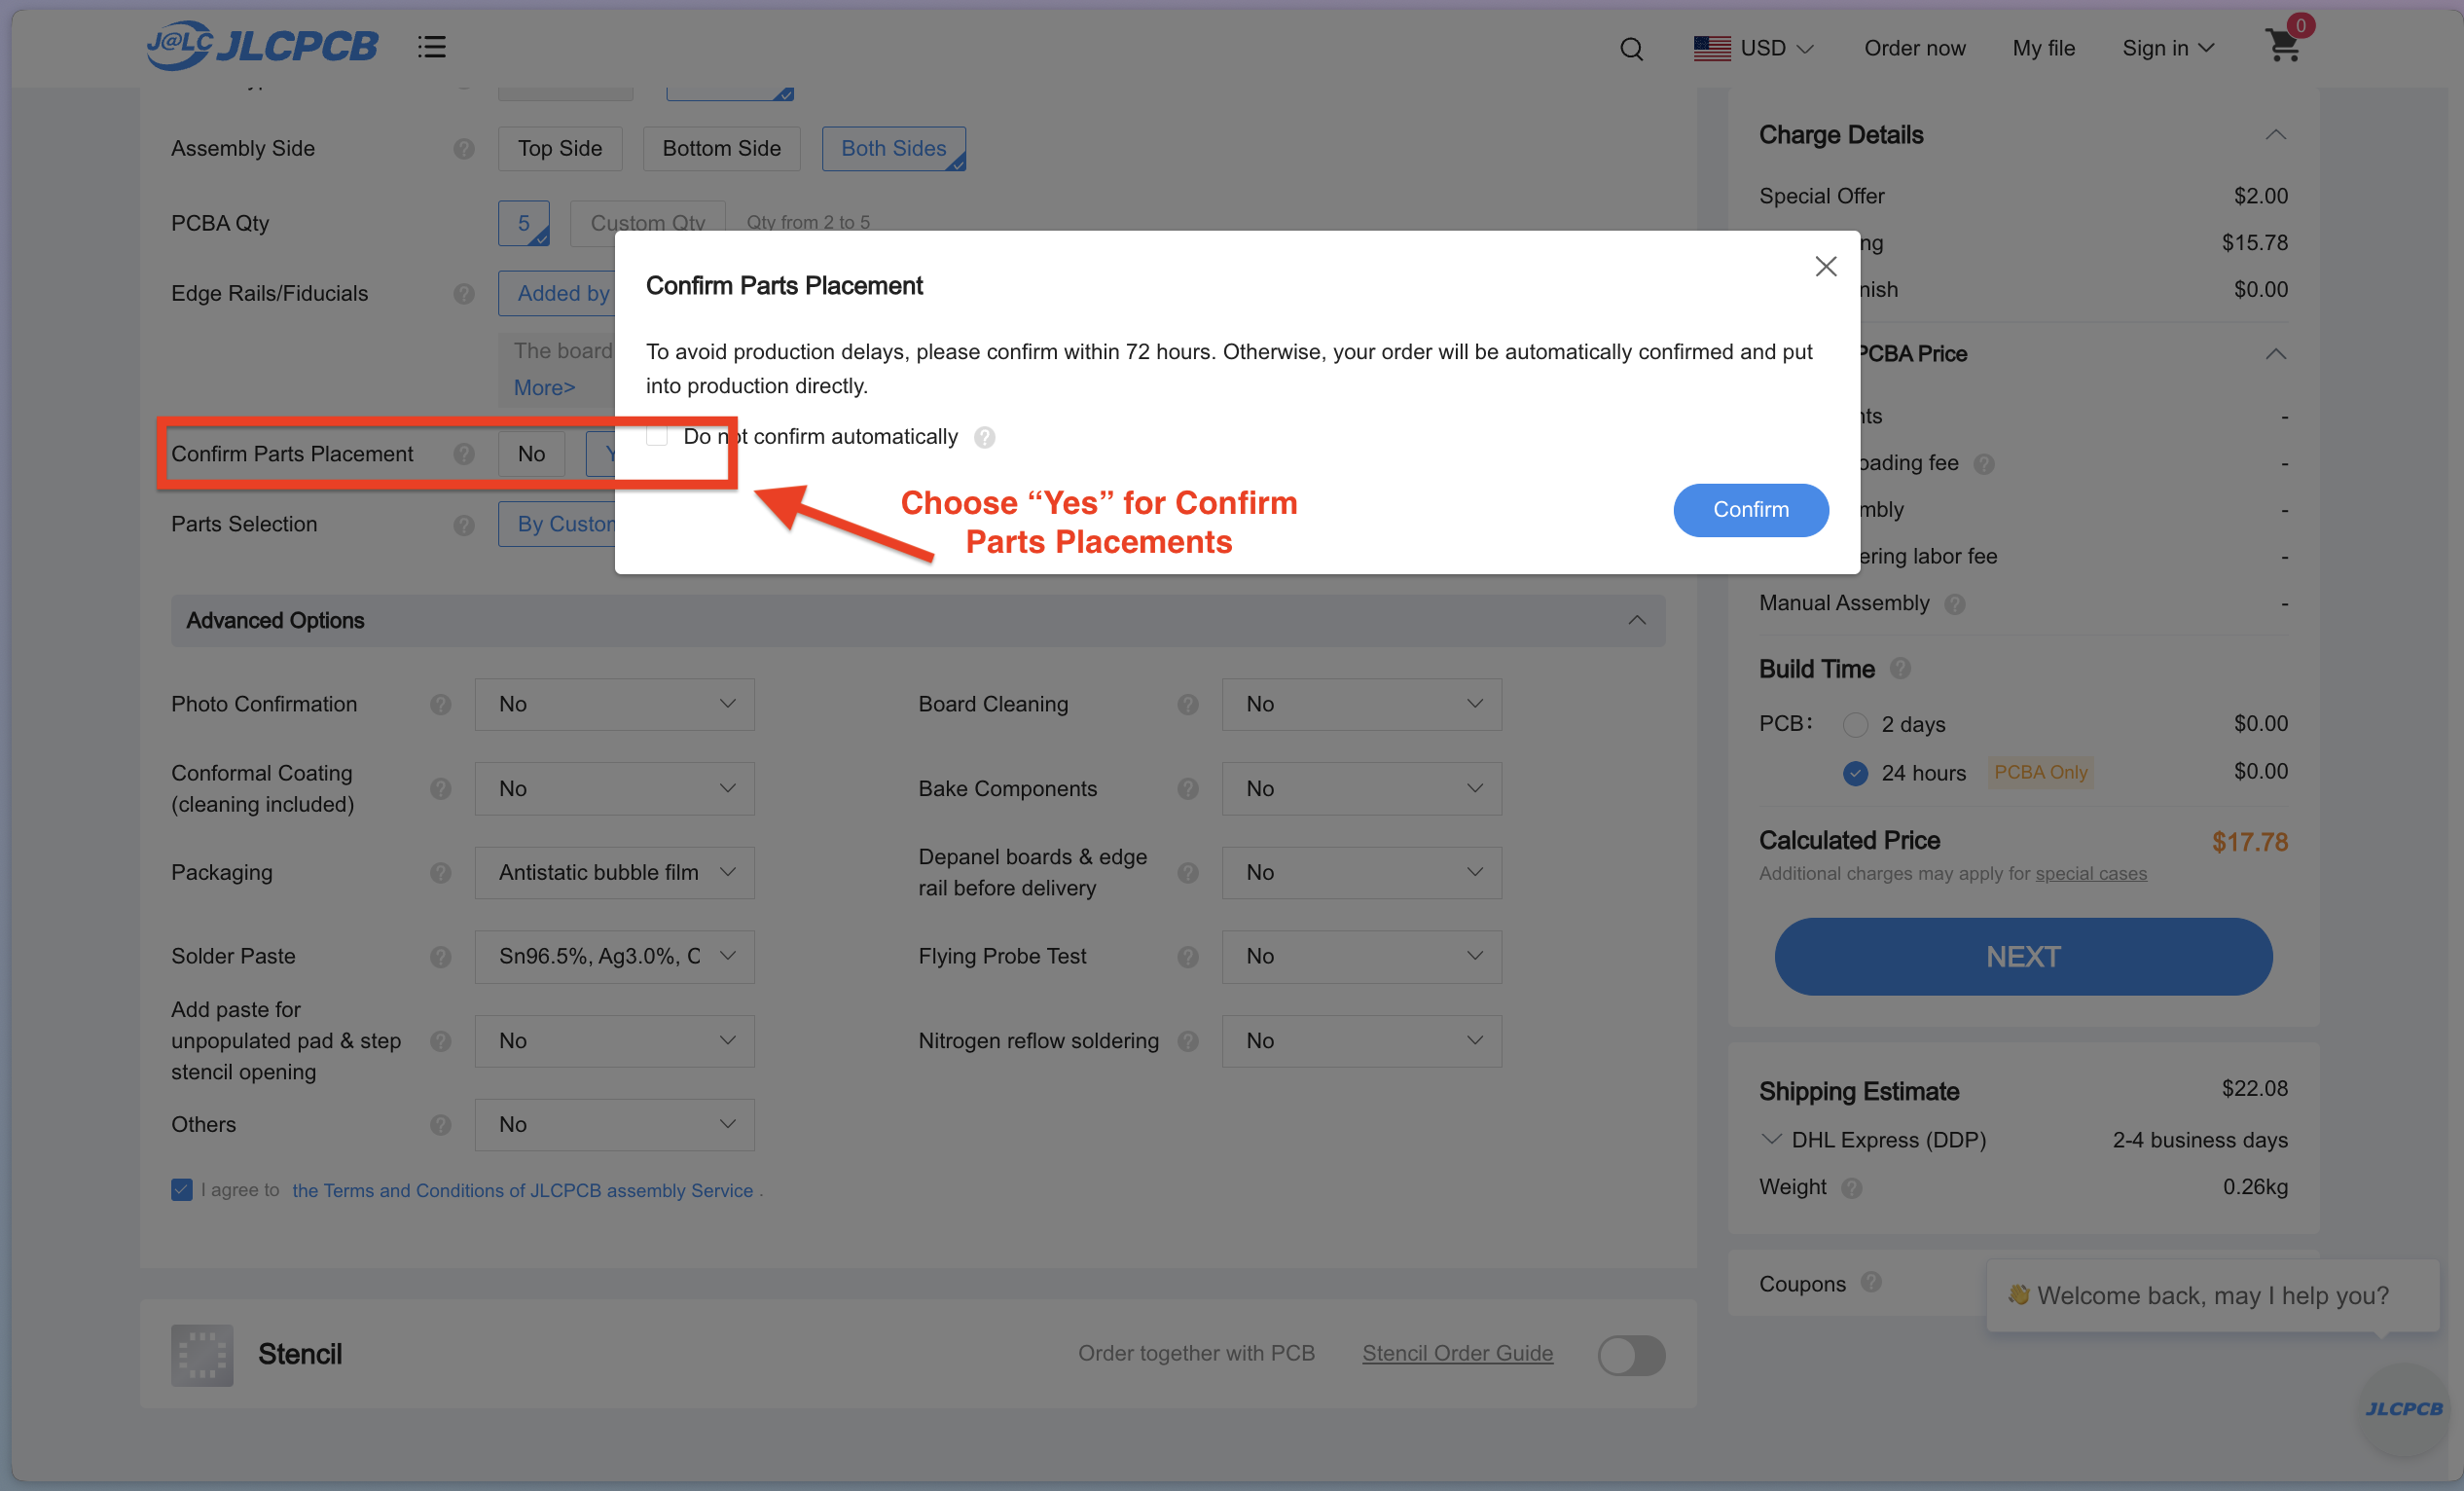
- Choose “Confirm Part Placement,” and check Do Not Confirm Automatically.
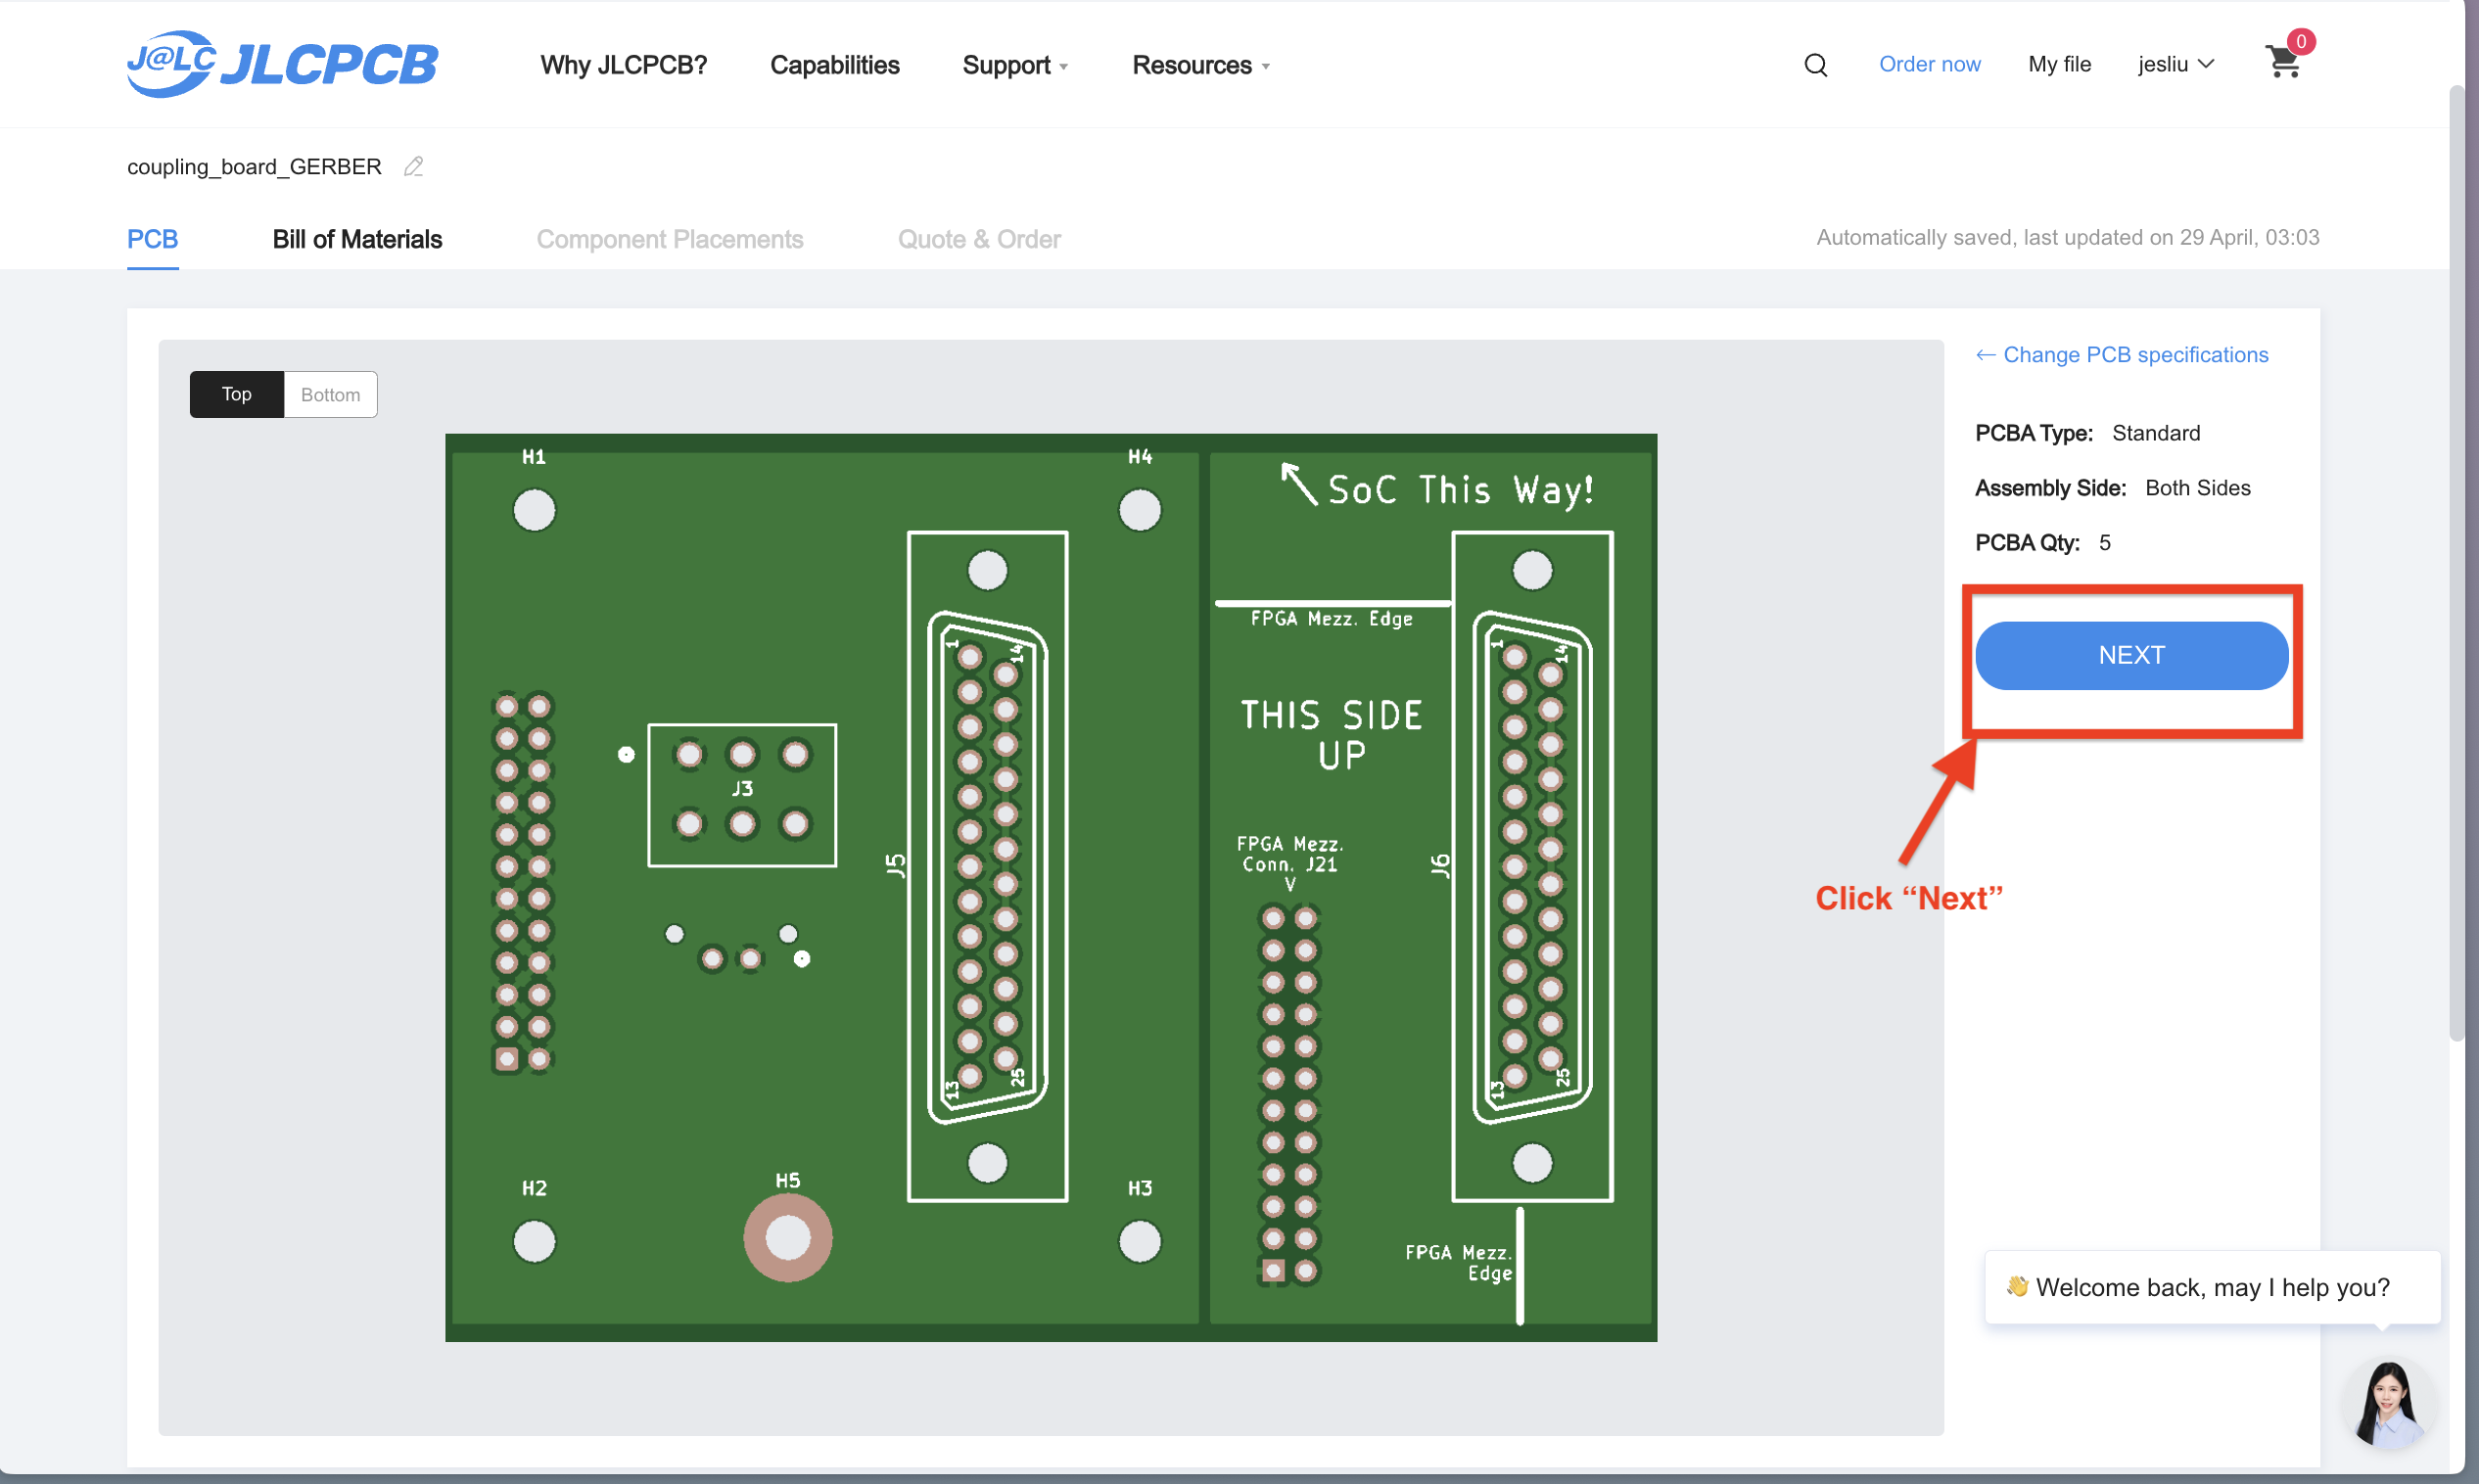
Continue to the next step by clicking “Next”.
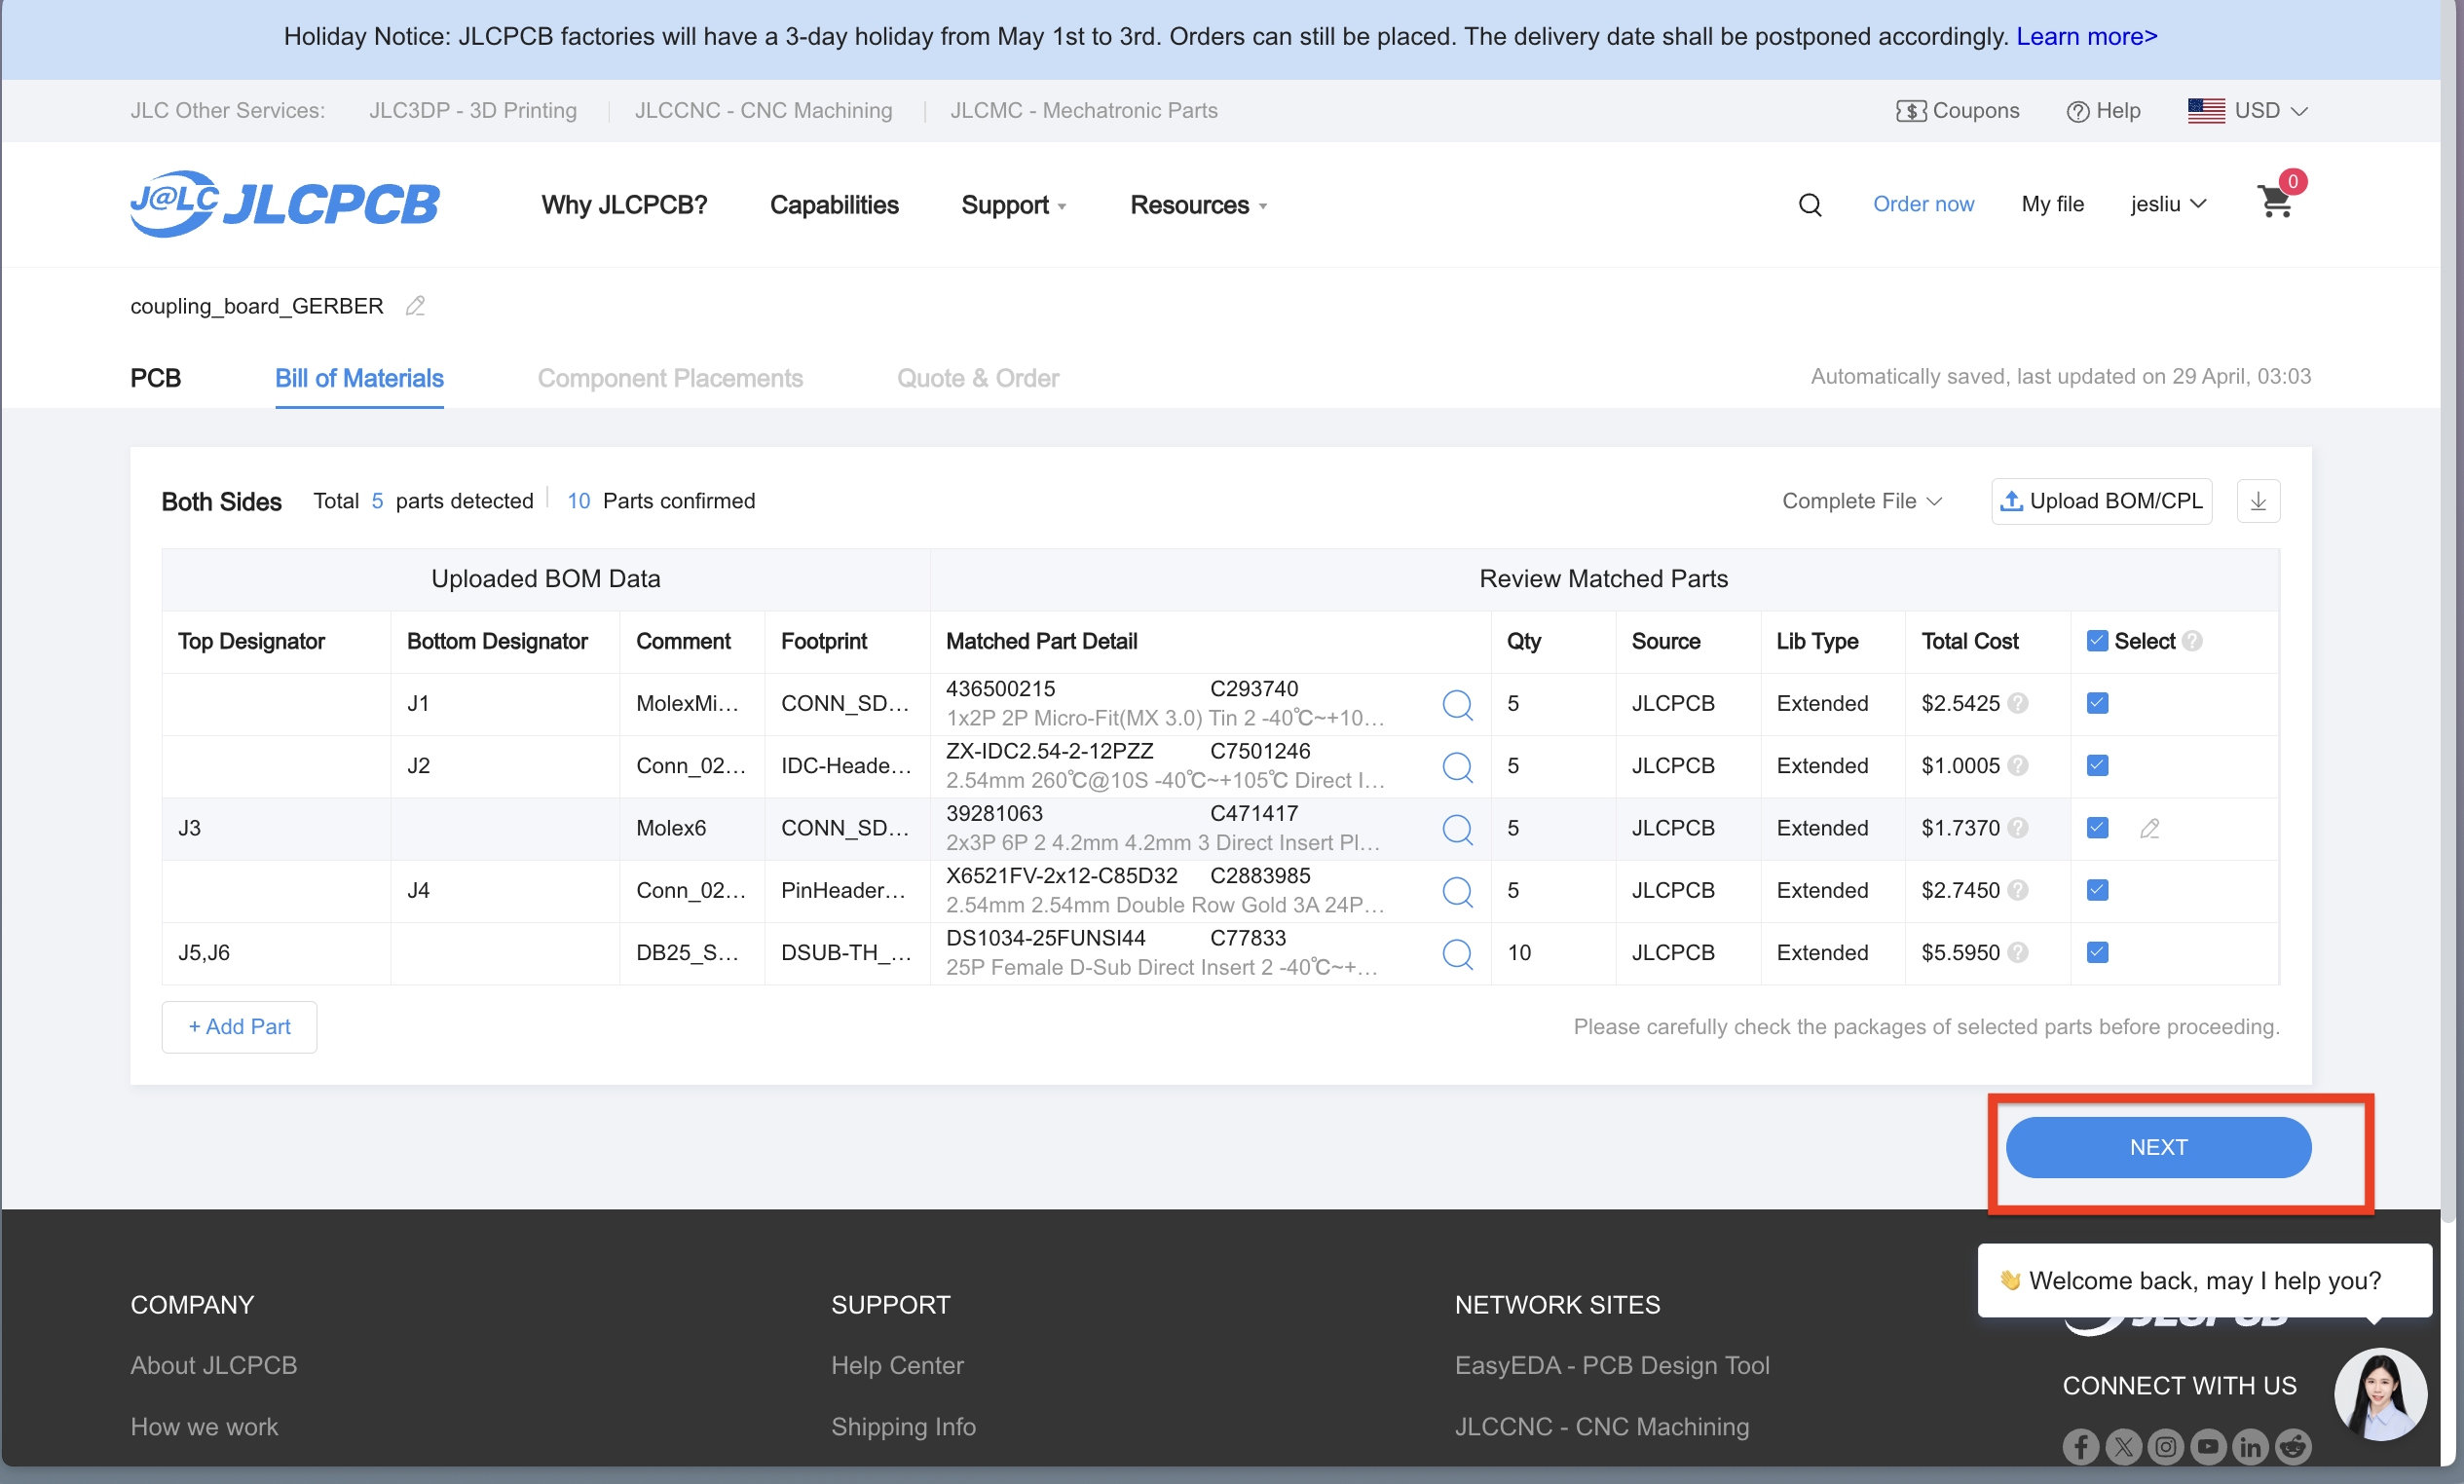
Upload your BOM and CPL files then click “Proceed BOM & CPL”.
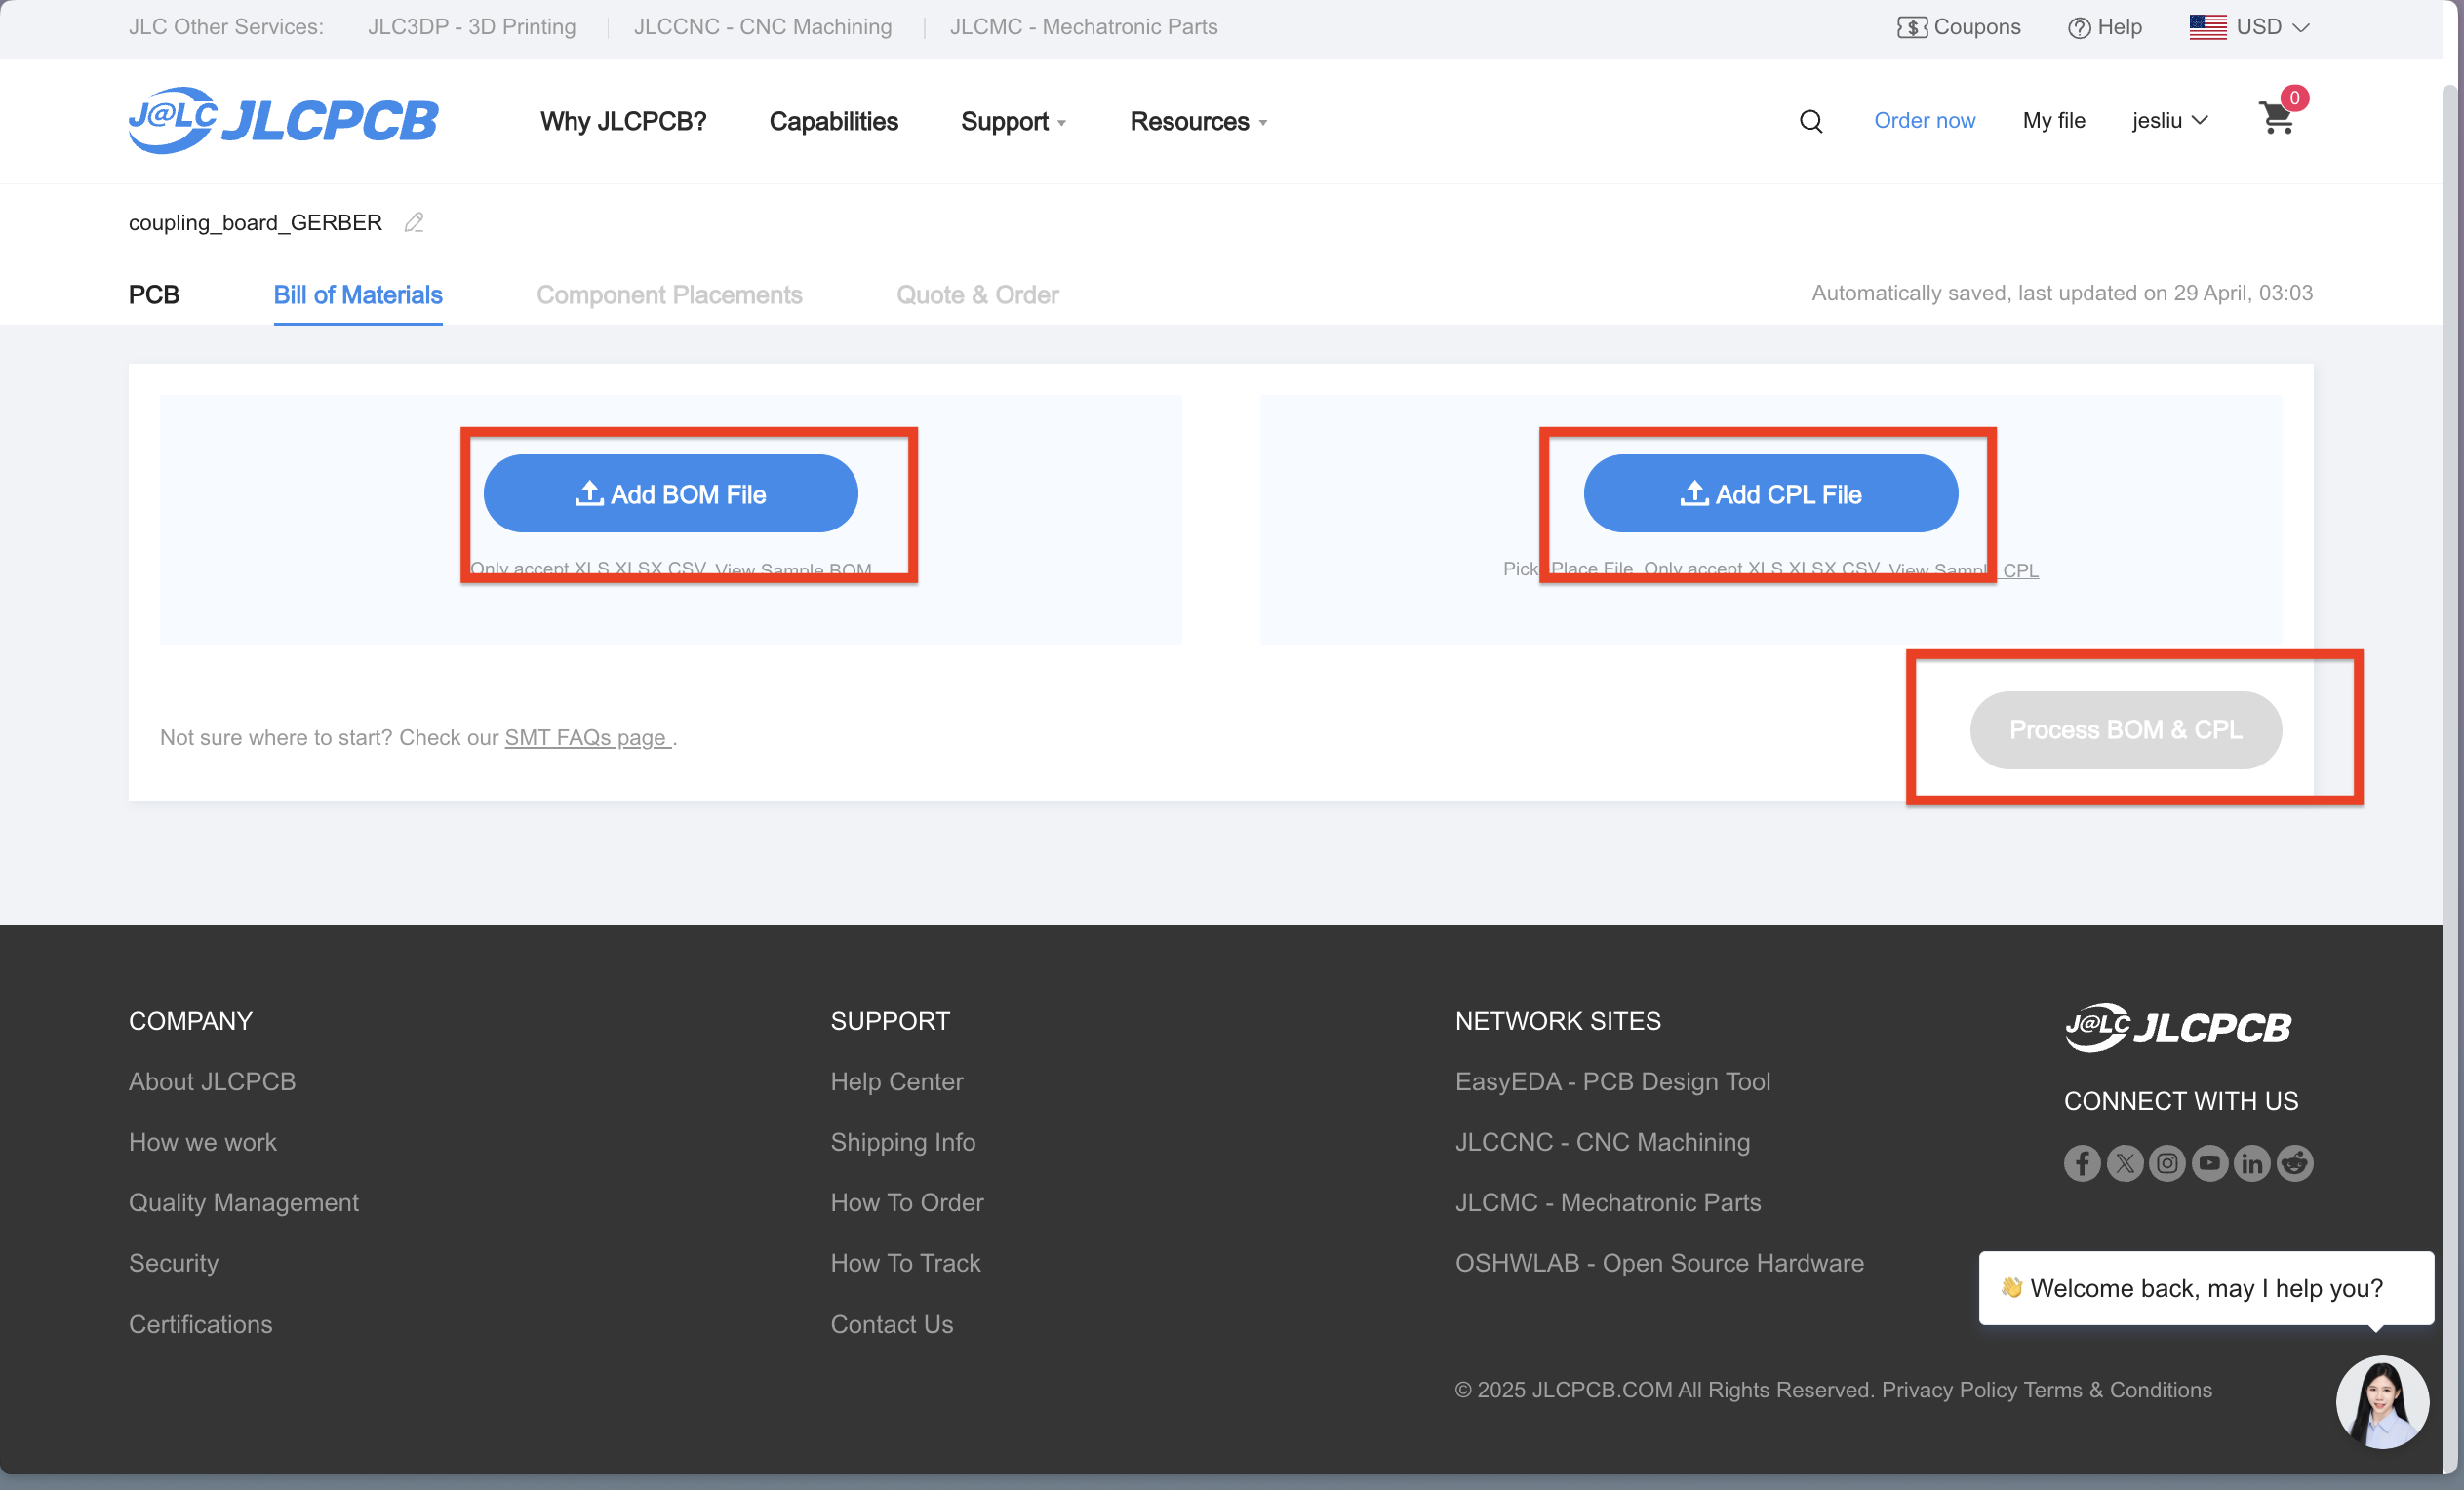
- Select any unspecified parts, and confirm the displayed BOM. Make sure you have the quantities of all parts in stock. Continue to the next step by clicking “Next”.
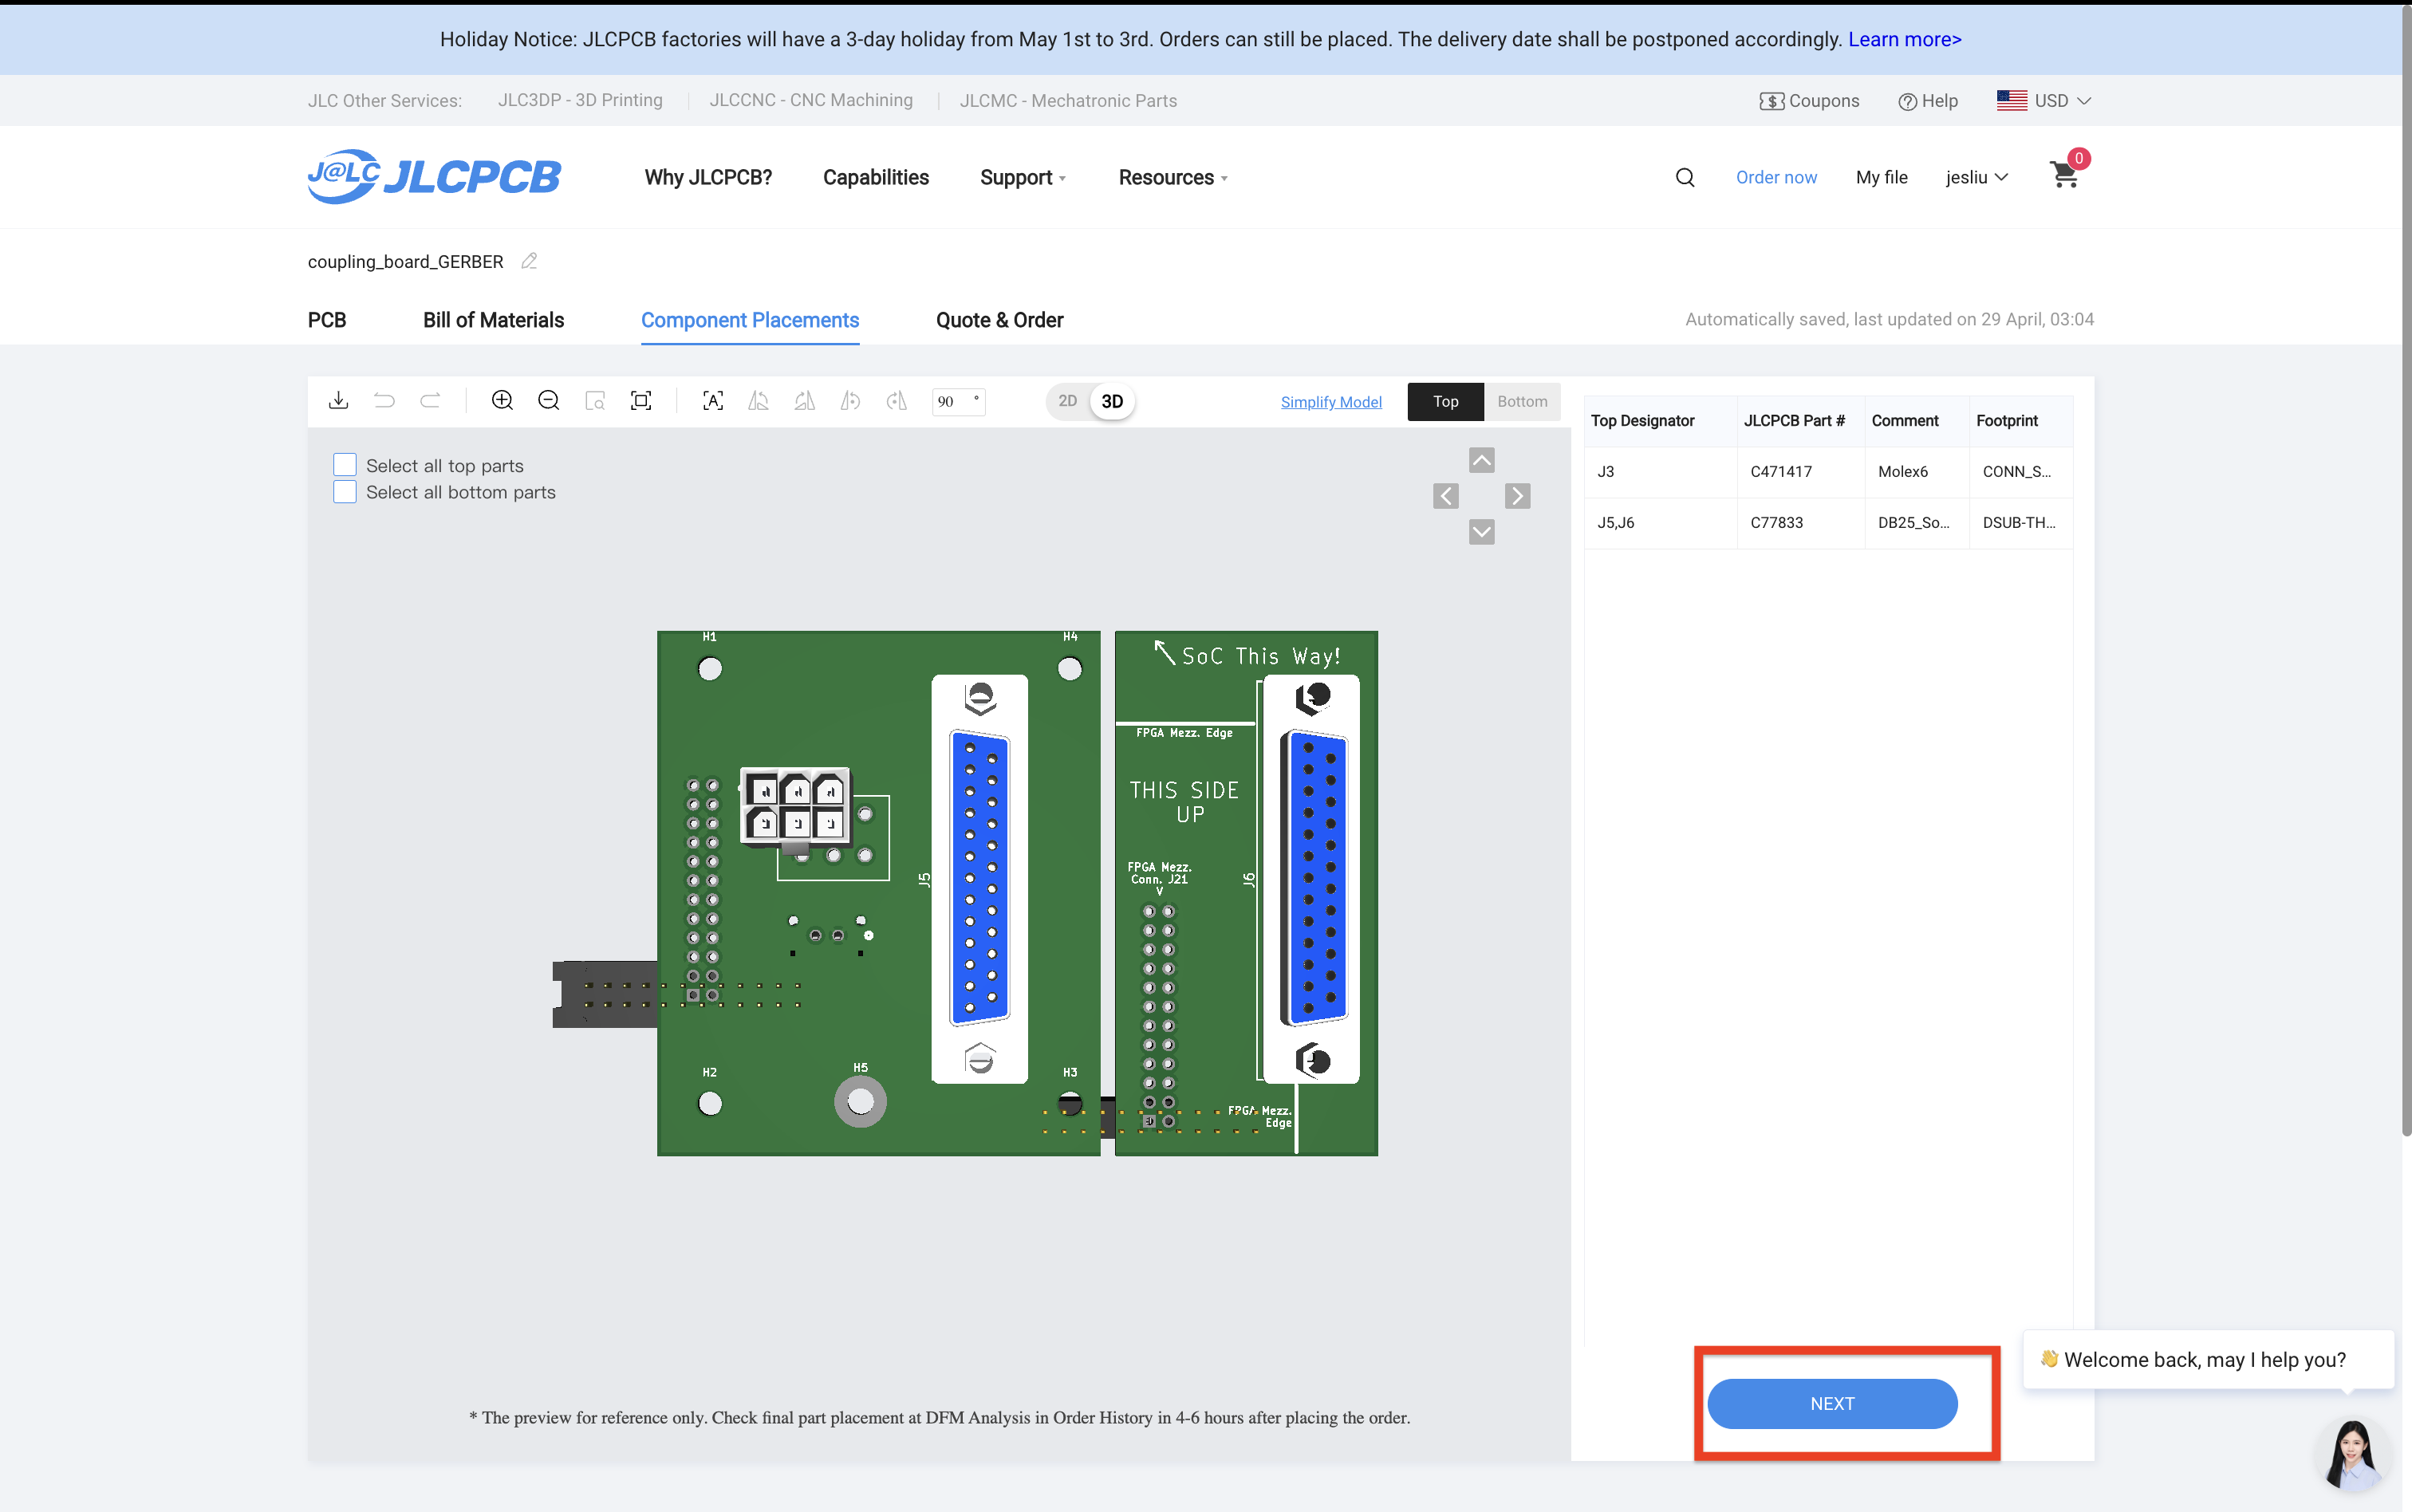
- Continue to the next step by clicking “Next”.
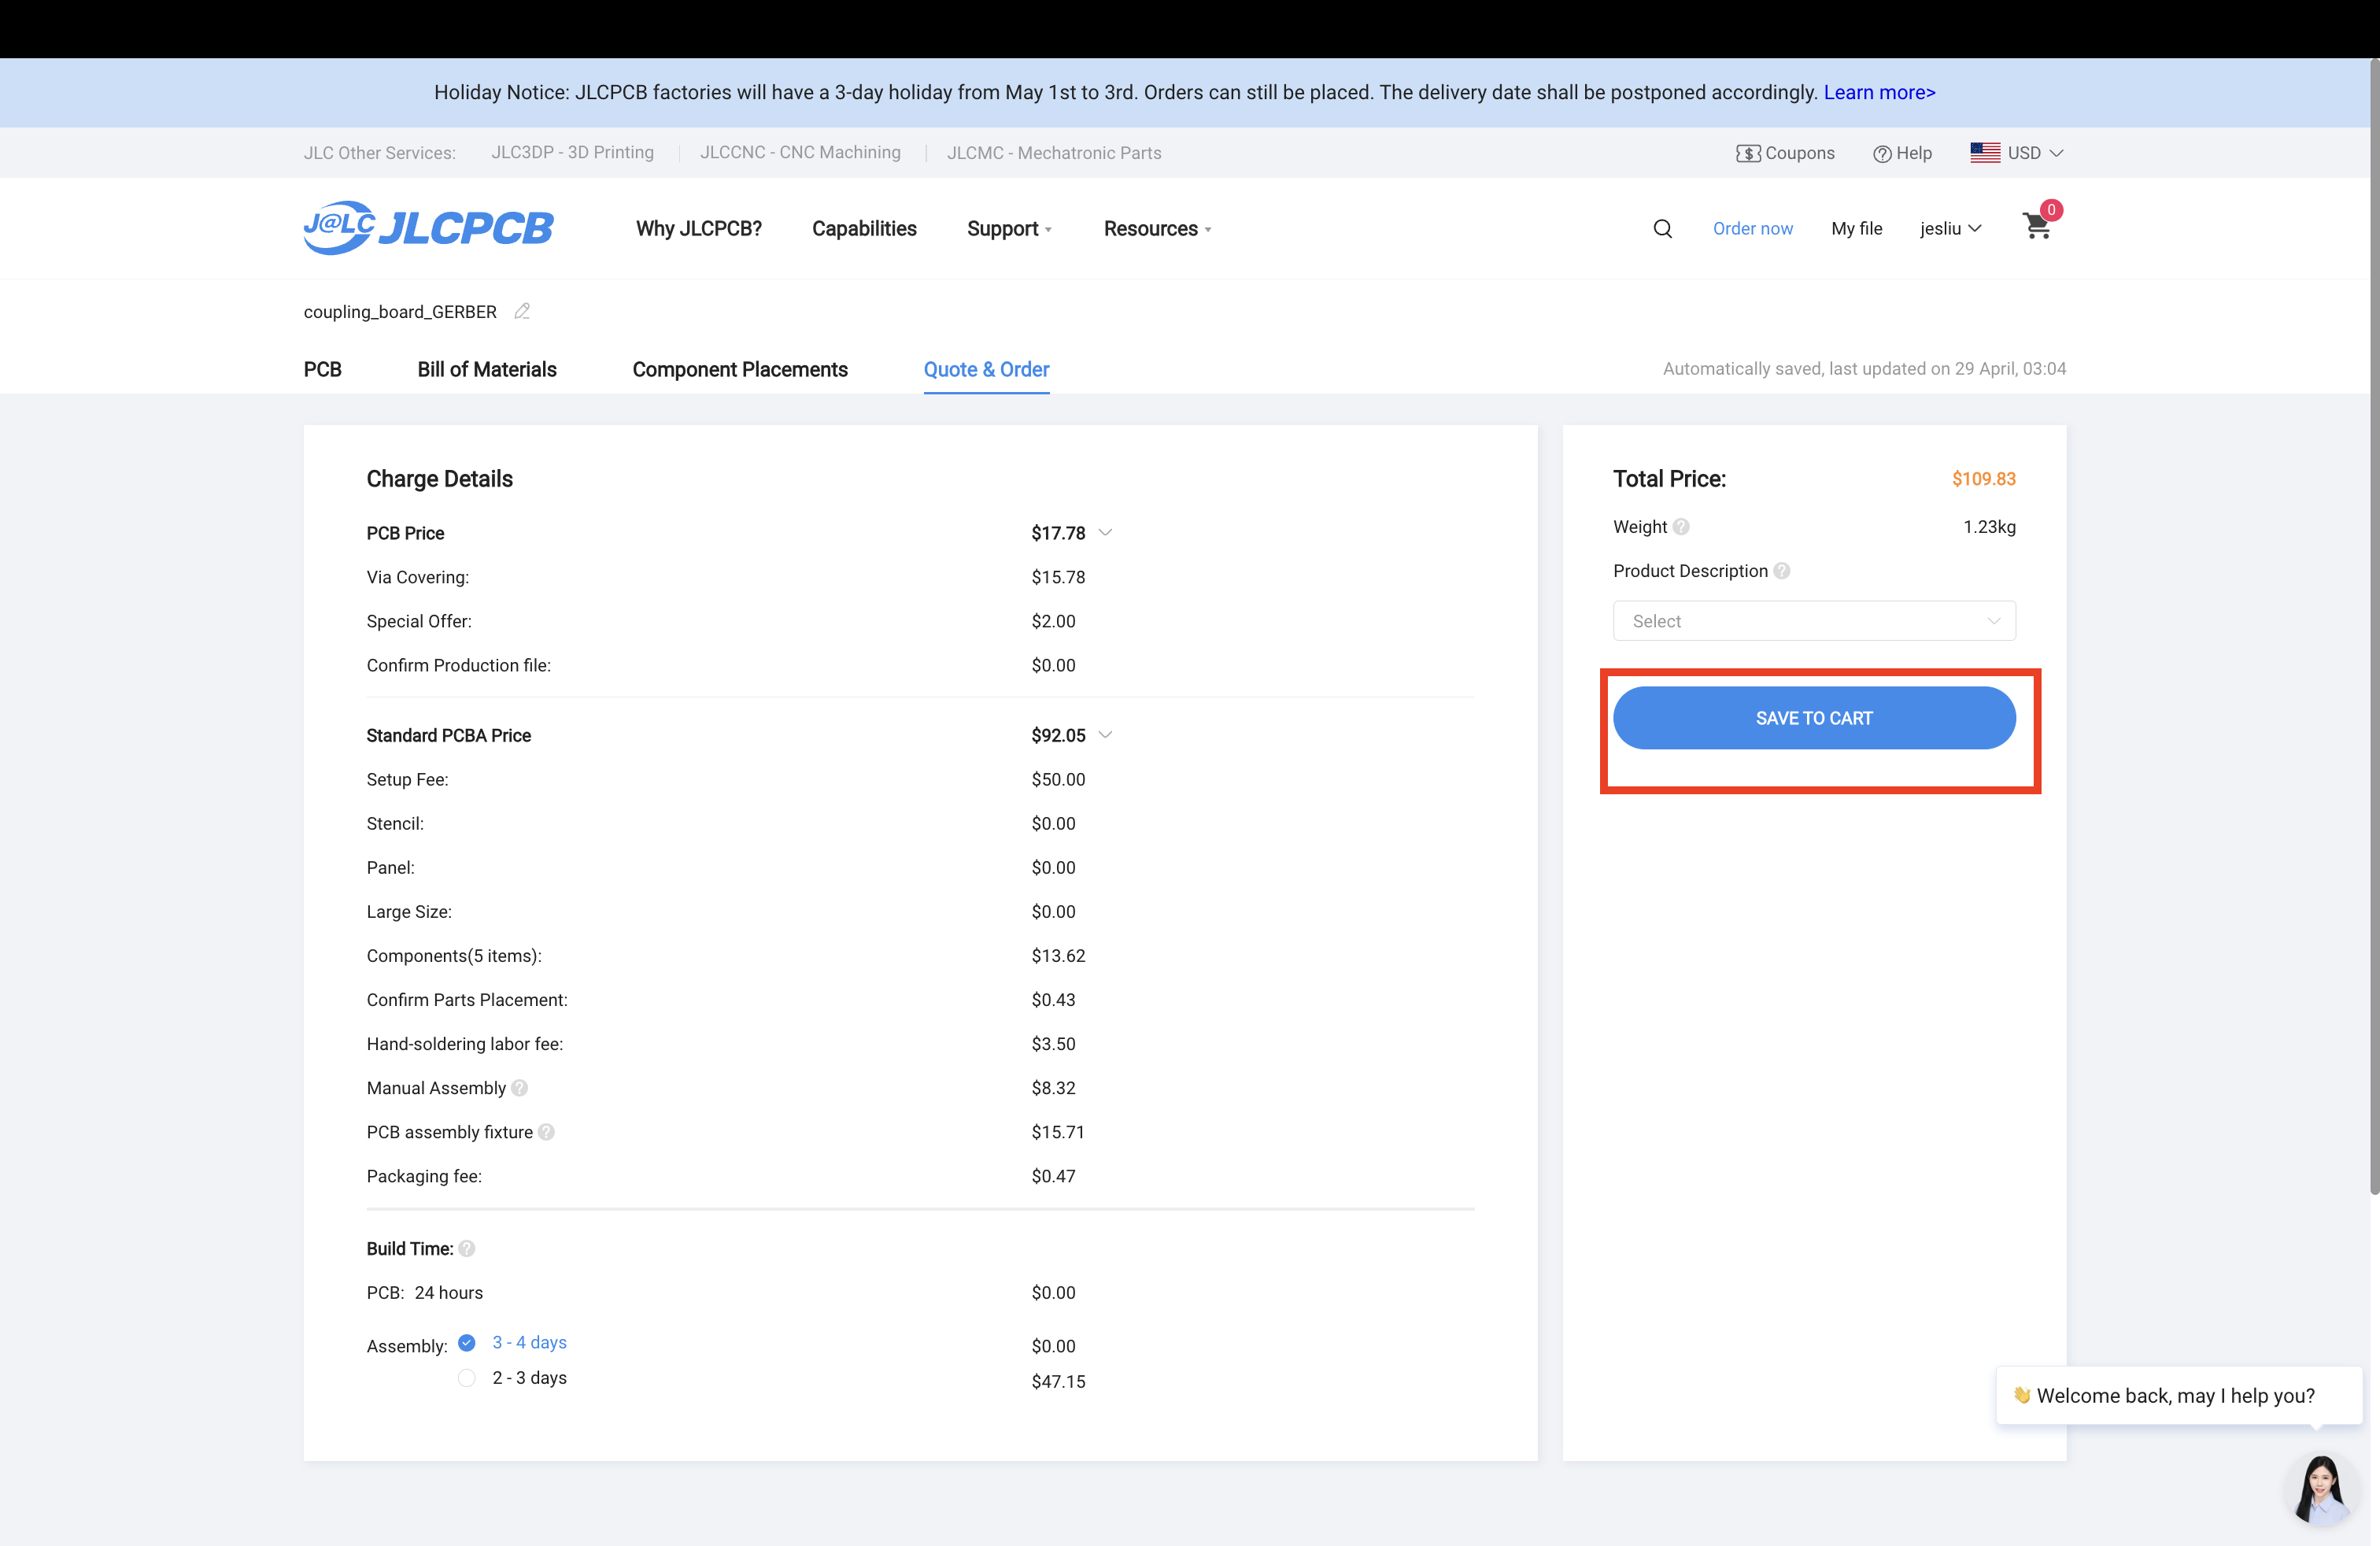
Most likely, the parts on this page will not align properly. This is okay. Per multiple conversations with JLCPCB, their rendering software can struggle to visually align components and it is not a cause for concern. They have an engineer manually align this render after an order is placed. By selecting “Confirm Parts Placement” in step 4 above, we will get a chance to check their work before giving the final order a go.
- Click “Save to the cart” and proceed to checkout!